Oracle 23c: Hybrid Read-Only Mode for Pluggable Databases
Overview: Oracle 23c database introduces a new feature to open Pluggable database in a new mode called hybrid read-only Hybrid read-only mode enables ... Read More
Learn more about why Eclipsys has been named the 2023 Best Workplaces in Technology and Ontario, Certified as a Great Place to Work in Canada and named Canada’s Top SME Employer!
Learn more!In this blog, we will cover the steps to create MySQL Heatwave in Oracle OCI and load MySQL shell dump data into MySQL HeatWave from OCI object storage
Prerequisites:
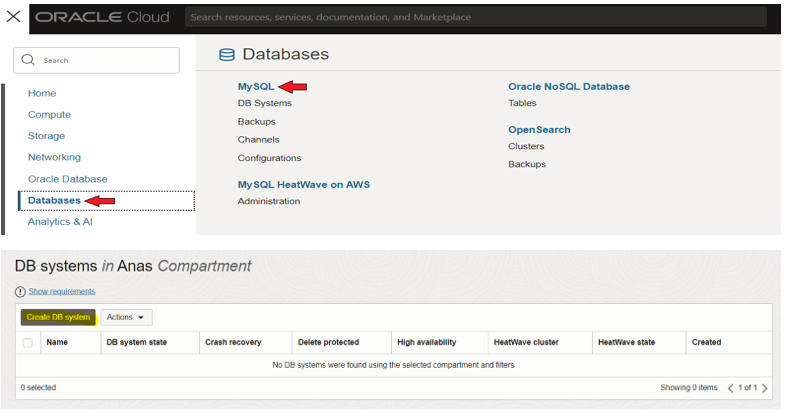
1. Sign in to your Oracle Cloud account. Navigate to “Databases” > “MySQL”. On the “DB System” page, ensure you have the correct compartment selected and click ‘Create DB System’
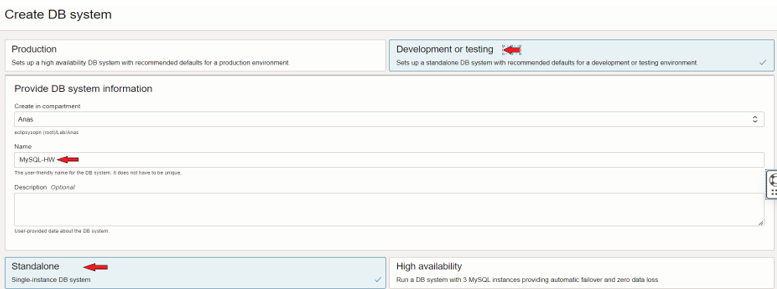
2. Name MySQL database system ‘MySQL-HW’. Select ‘Development or testing’ and enable the ‘MySQL HeatWave’ option under the ‘Configure MySQL HeatWave’ section

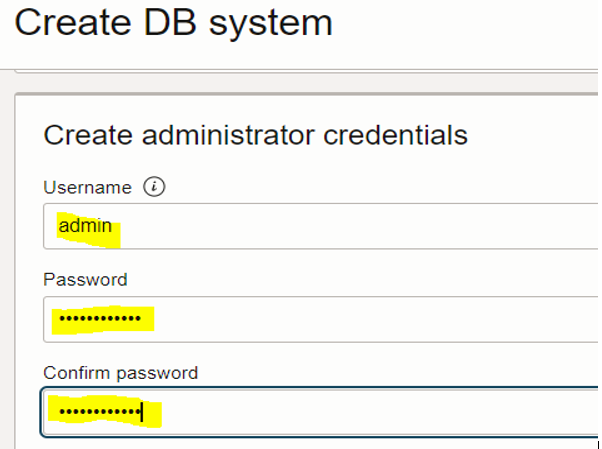
3. Under the ‘Create Administrator Credentials’ section, enter MySQL admin username and password
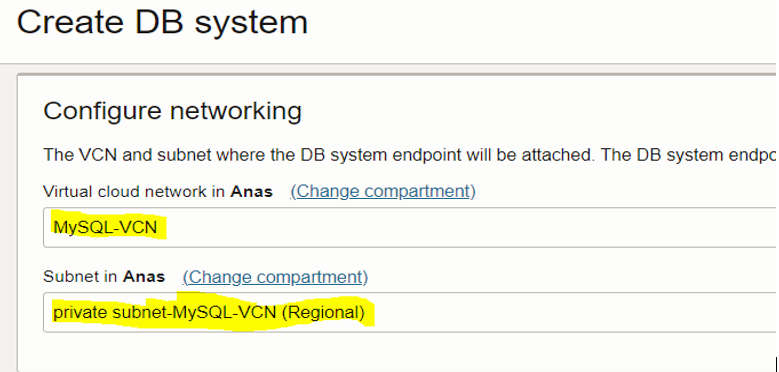
4. Under the ‘Configure networking’ section, make sure to pick a private subnet
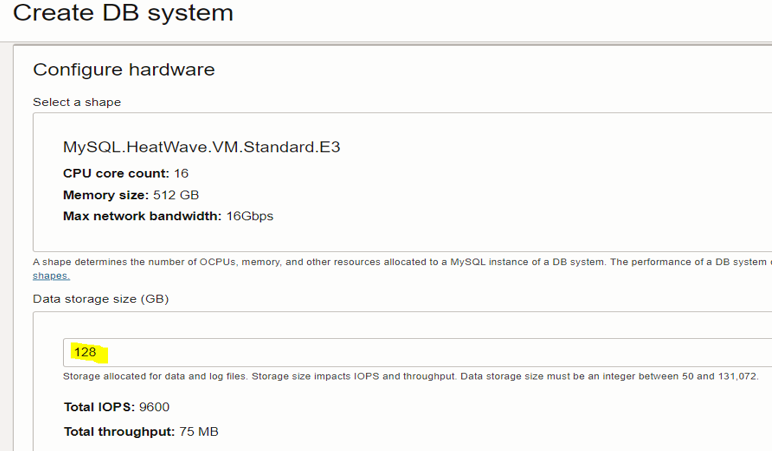
5. Under the ‘Configure Hardware’ section, keep the default shape and set the Data storage size to the appropriate size based on your MySQL shell dump data size
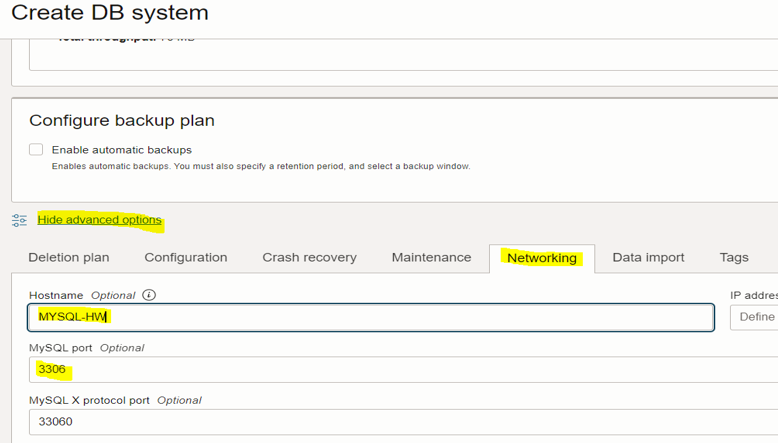
6. Click on “Show advanced options”, and click on the “Networking” tab. Enter hostname ‘MySQL-HW’ and leave the default port
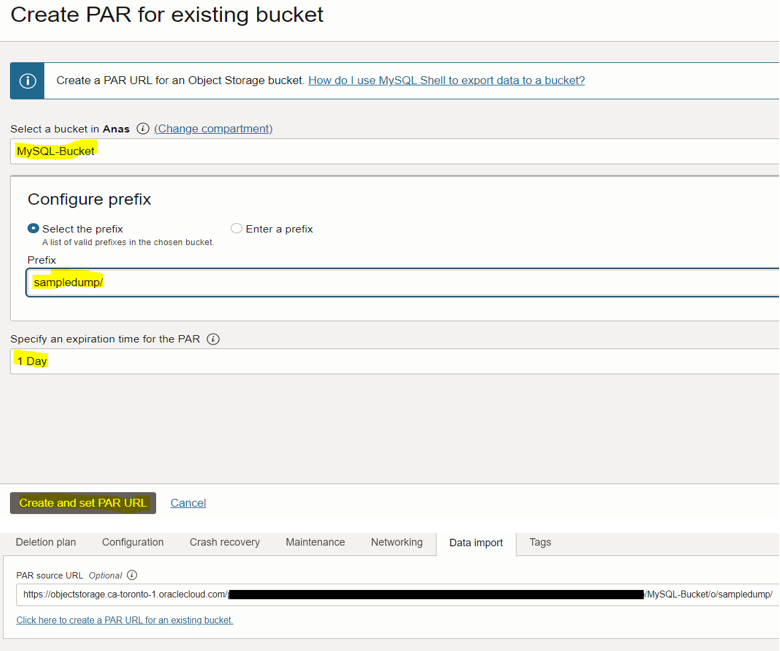
7. To load data from MySQL shell dump data created in the previous blog, click on the “Data Import” tab. Once you are on the ‘Data Import’ tab, click on the “Click here to create a PAR URL” link

8. On the ‘Create PAR for existing bucket’ screen, select ‘MySQL-Bucket’ created in the previous blog, specify the appropriate expiration time, then click ‘Create and set PAR URL’
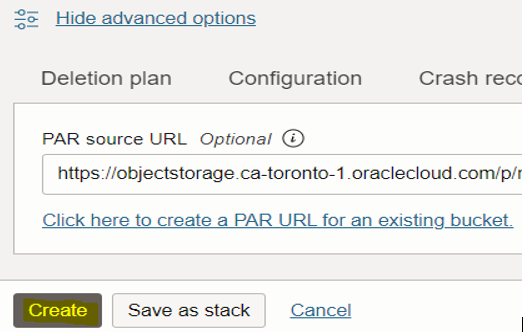
9. Click ‘Create’ to start creating the MySQL HeatWave system
10. Once your MySQL DB System is ‘ACTIVE’, a “Private IP Address” will be allocated to it
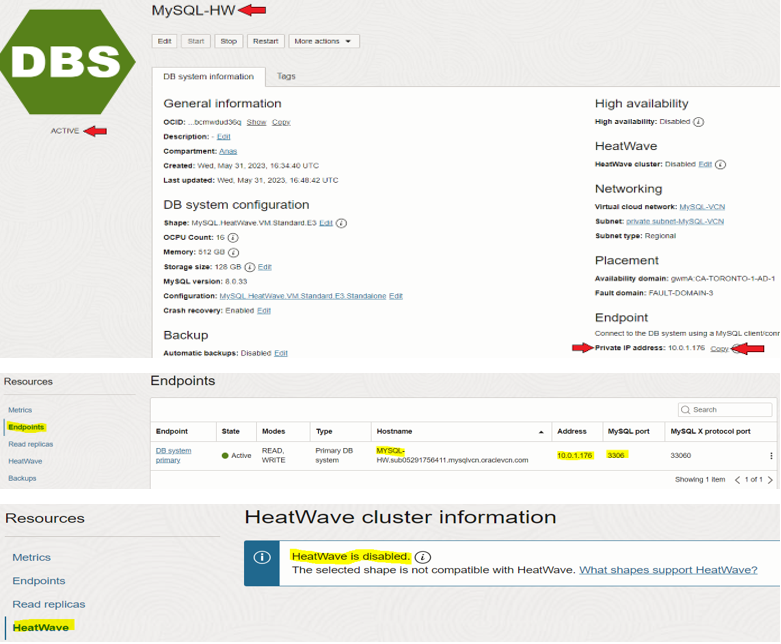
11. You can now log in to MySQL DB System using MySQL Shell from OCI compute instance (created in the previous blog). Copy MySQL HeatWave system private IP from the previous step
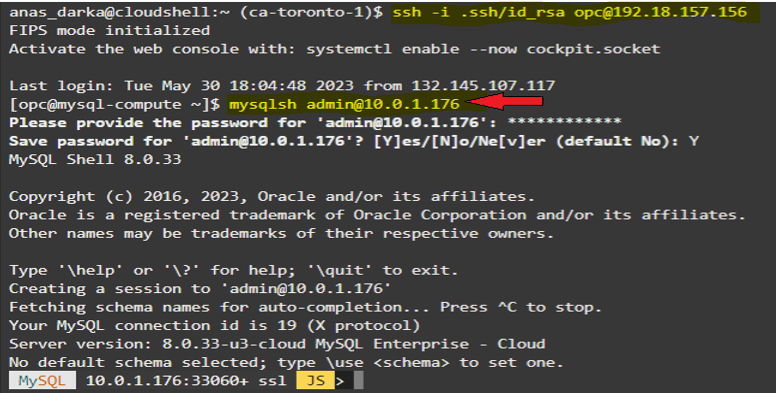
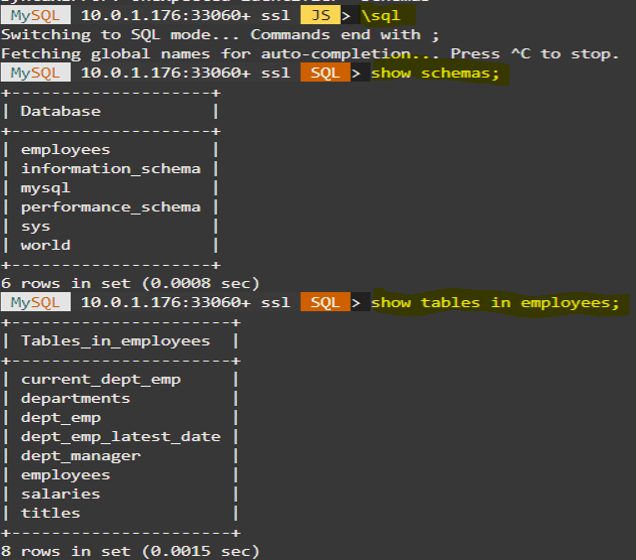
12. To confirm data load, switch to SQL mode “\sql”
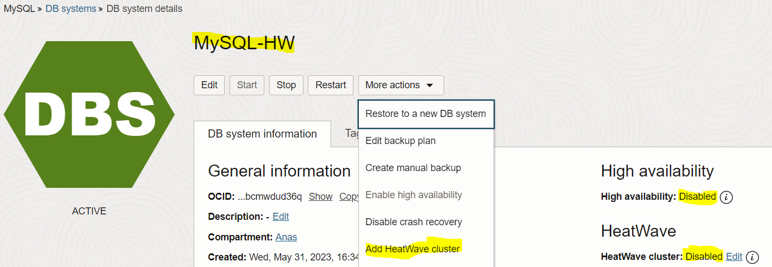
1. To Enable Heatwave for MySQL DB System, navigate to “Databases” > “MySQL”. Once on the MySQL page, click on the name of your MySQL HeatWave System. This will take you to the “DB System Details” page for your MySQL HeatWave. Upon landing on the “DB System Details” page, click on “More Actions“, then click the “Add HeatWave Cluster” option
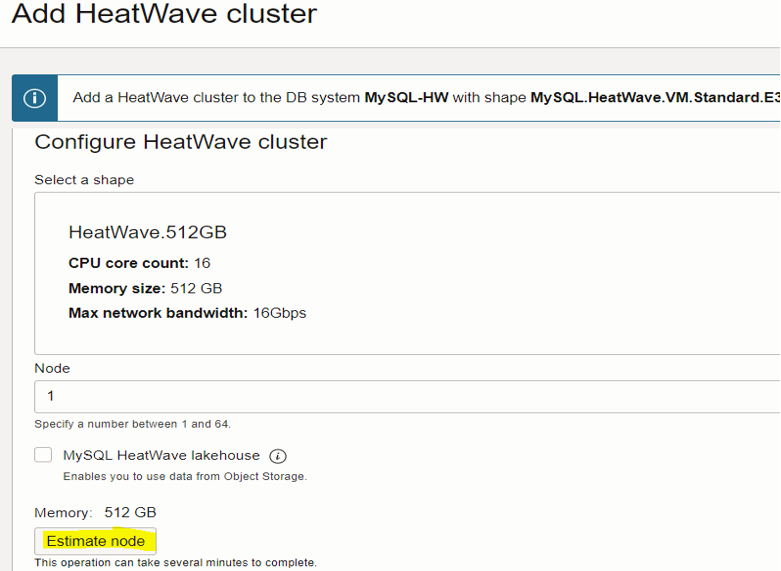
2. On the ‘Add HeatWave cluster’ screen, click “Estimate Node” to estimate the size of the HeatWave cluster and load the data into memory and run queries
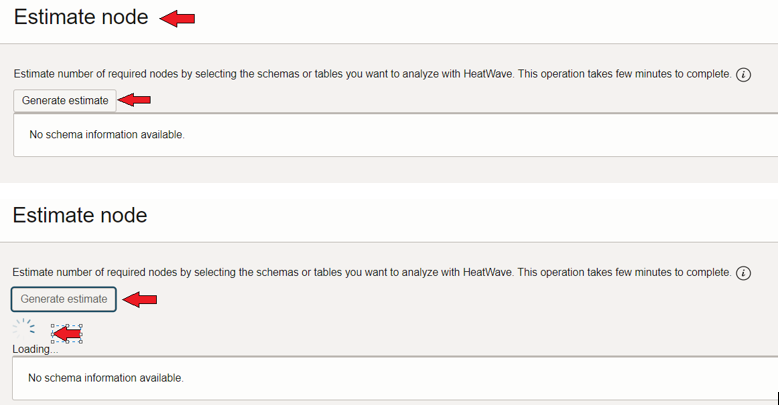
3. On the ‘Estimate node’ screen, click “Generate Estimate”. It will show you a list of all the databases that you have in your MySQL HeatWave system. Afterwards, you can select what tables and databases you want to load in-memory, from the list of databases that will appear after clicking “Generate Estimate”. Once you click on “Generate Estimate”, it may take several minutes to display your schema information.
It pulled up all the databases that we currently have in MySQL. You can either select the whole database or select individual tables that you want to load in memory.
In this lab, we will select both databases ‘employees’ & ‘world’.
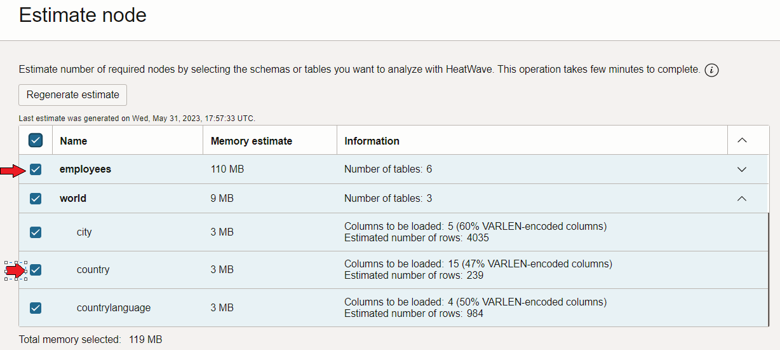
4. After you are done selecting the tables/databases you want to load in memory, on that same screen, scroll down until you see the “Summary” and “Load Command” sections. The “Summary” section shows how many HeatWave nodes will be required depending on the data we have selected
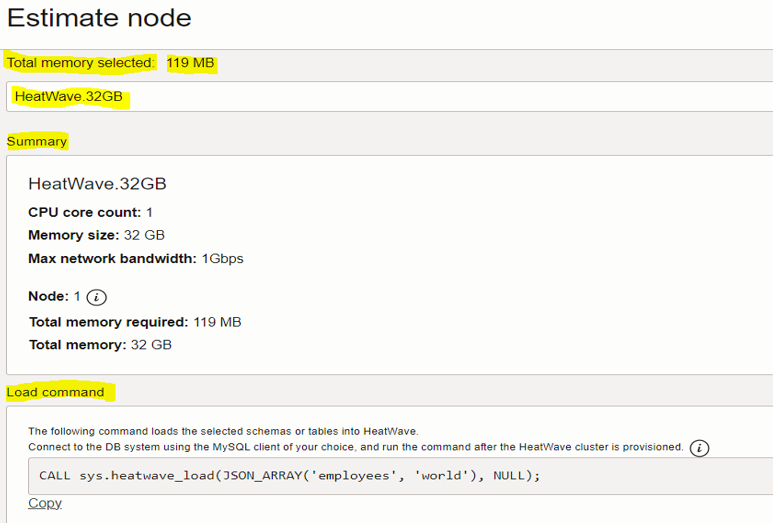
5. Under the “Load Command” section, copy that line of code, afterwards, click “Apply Estimated Node“

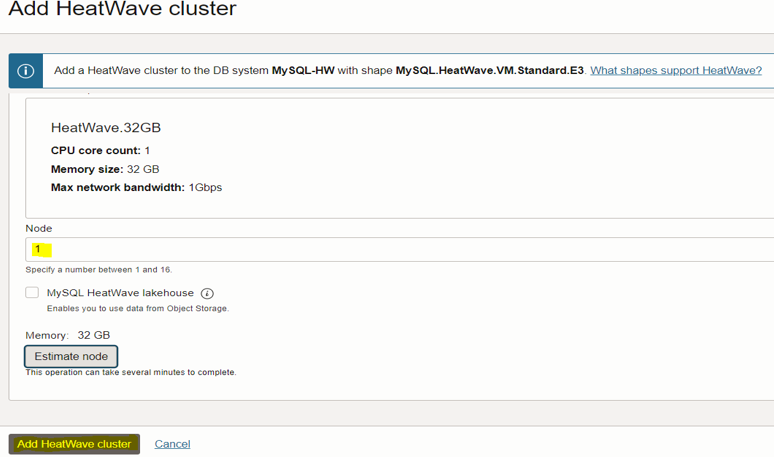
6. After clicking “Apply Estimated Node”, the number of nodes required to load the data that you have selected, will change (depending on your data size). Finally, click “Add HeatWave Cluster” to finish the HeatWave cluster creation process
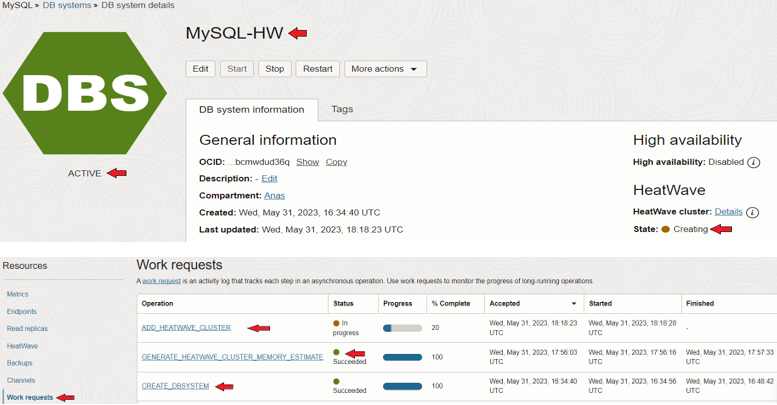
7. After clicking “Add HeatWave Cluster”, you can see the status of the Cluster to “Creating” on the “DB System Details” page
You can track the cluster creation process from “Work Requests” under the ‘Resources’ section on the left
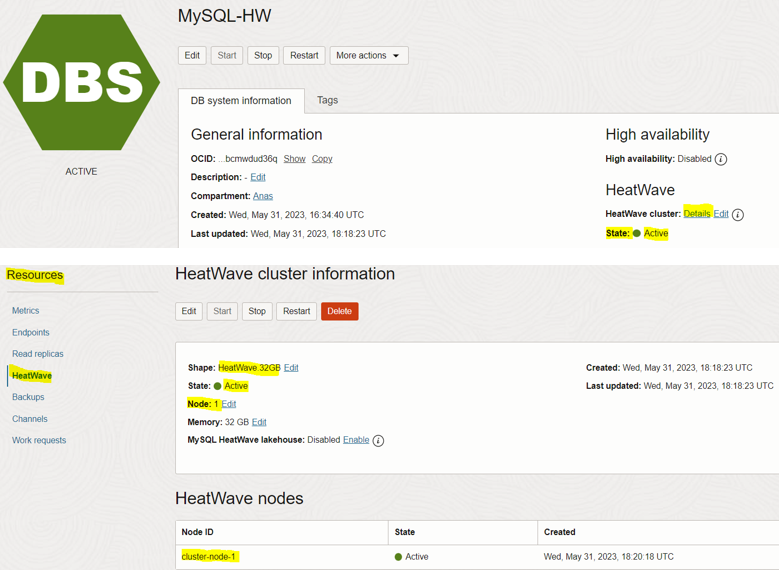
8. After the HeatWave cluster is created, the ‘Cluster state: ACTIVE’
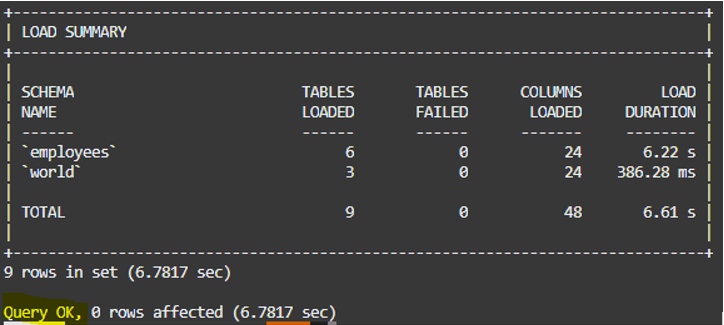
9. Login back into the MySQL HeatWave system and load data into memory by executing the load command copied in step 5 above
Command: CALL sys.heatwave_load(JSON_ARRAY(’employees’, ‘world’), NULL);
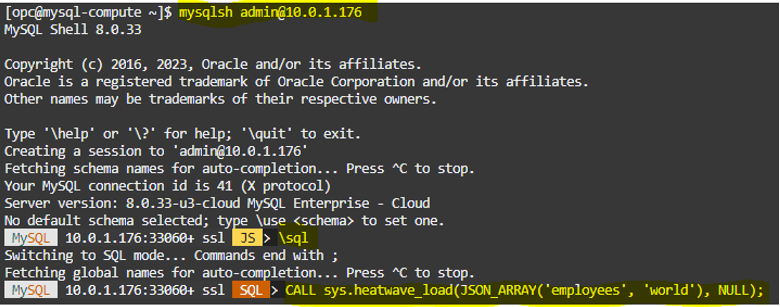
10. Once the load command completes, MySQL HeatWave will automatically load all your data into in-memory. You should see the message “Query OK“
This concludes the workshop on how to migrate MySQL data from MySQL 8 Community Edition running on OCI compute instance to OCI MySQL HeatWave
Hope you enjoy it!
Overview: Oracle 23c database introduces a new feature to open Pluggable database in a new mode called hybrid read-only Hybrid read-only mode enables ... Read More
Overview: A MySQL configuration is a collection of variables that define the operation of a MySQL DB system. It is analogous to ... Read More