Oracle 23c: Hybrid Read-Only Mode for Pluggable Databases
Overview: Oracle 23c database introduces a new feature to open Pluggable database in a new mode called hybrid read-only Hybrid read-only mode enables ... Read More
Découvrez pourquoi Eclipsys a été nommée 2023 Best Workplaces in Technology, Great Place to Work® Canada et Canada's Top 100 SME !
En savoir plus !In this blog, I’ll demonstrate the steps to patch/update the ExaCC VM cluster OS image to the latest available release update using the OCI console.
1. Sign in to your OCI tenancy where your Exadata Database Service on Cloud @ Customer system is deployed.
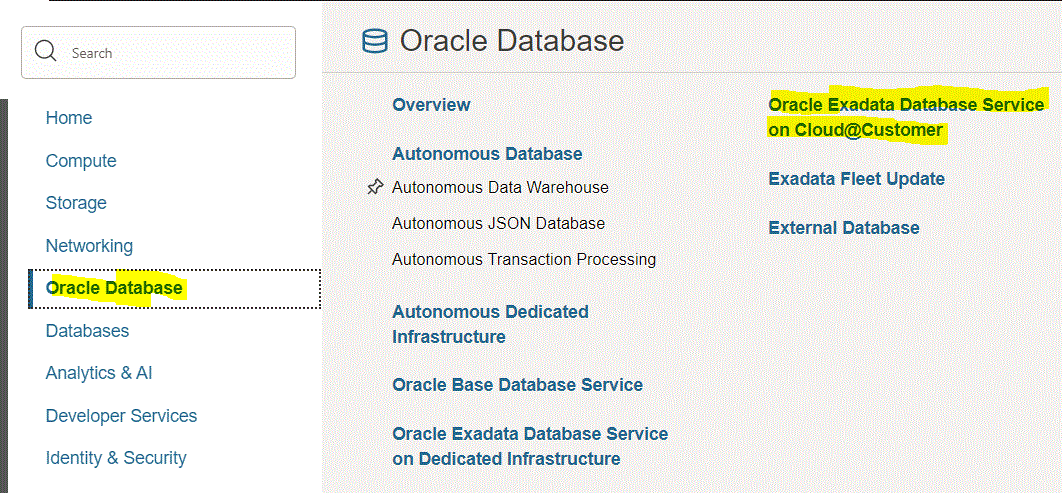
2. Navigate to “Oracle Database” > “Oracle Exadata Database Service on Cloud@Customer” > “Exadata VM Clusters“.
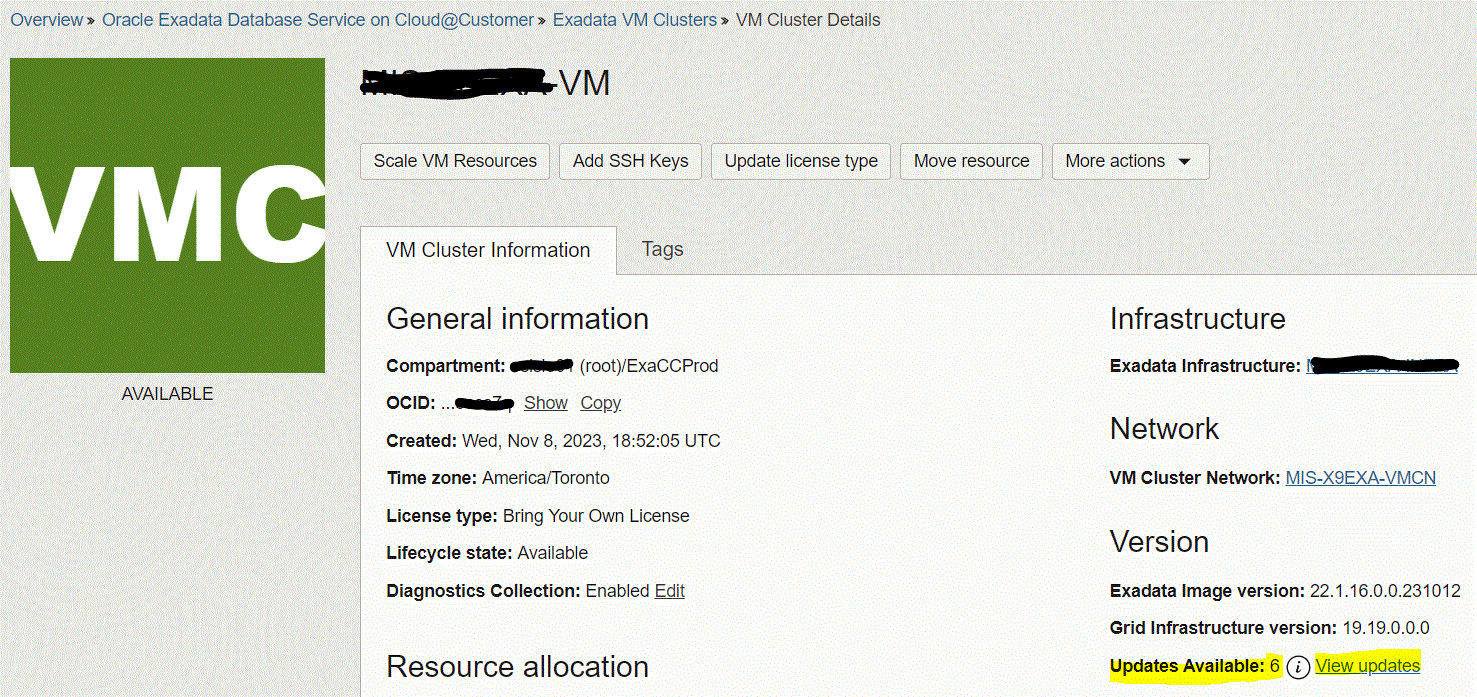
3. Click on your VM Cluster Name.

4. On the VM Cluster details home page, next to “Updates Available” click the “View Updates” link.
5. Run patching Precheck.
If the precheck is not successful, then the patch is not applied, and the system displays a message that the patch cannot be applied because the precheck failed.
– On the Patches releases page, you will a list of available release update patches for “Virtual Machine OS Update” and “Grid Infrastructure Release Update“.
– Review the list of available software updates. Click the Actions icon (three dots) at the end of the row listing the patch you are interested in, and then click the “Precheck” action, then run the “Run Precheck” button in the confirm precheck screen.
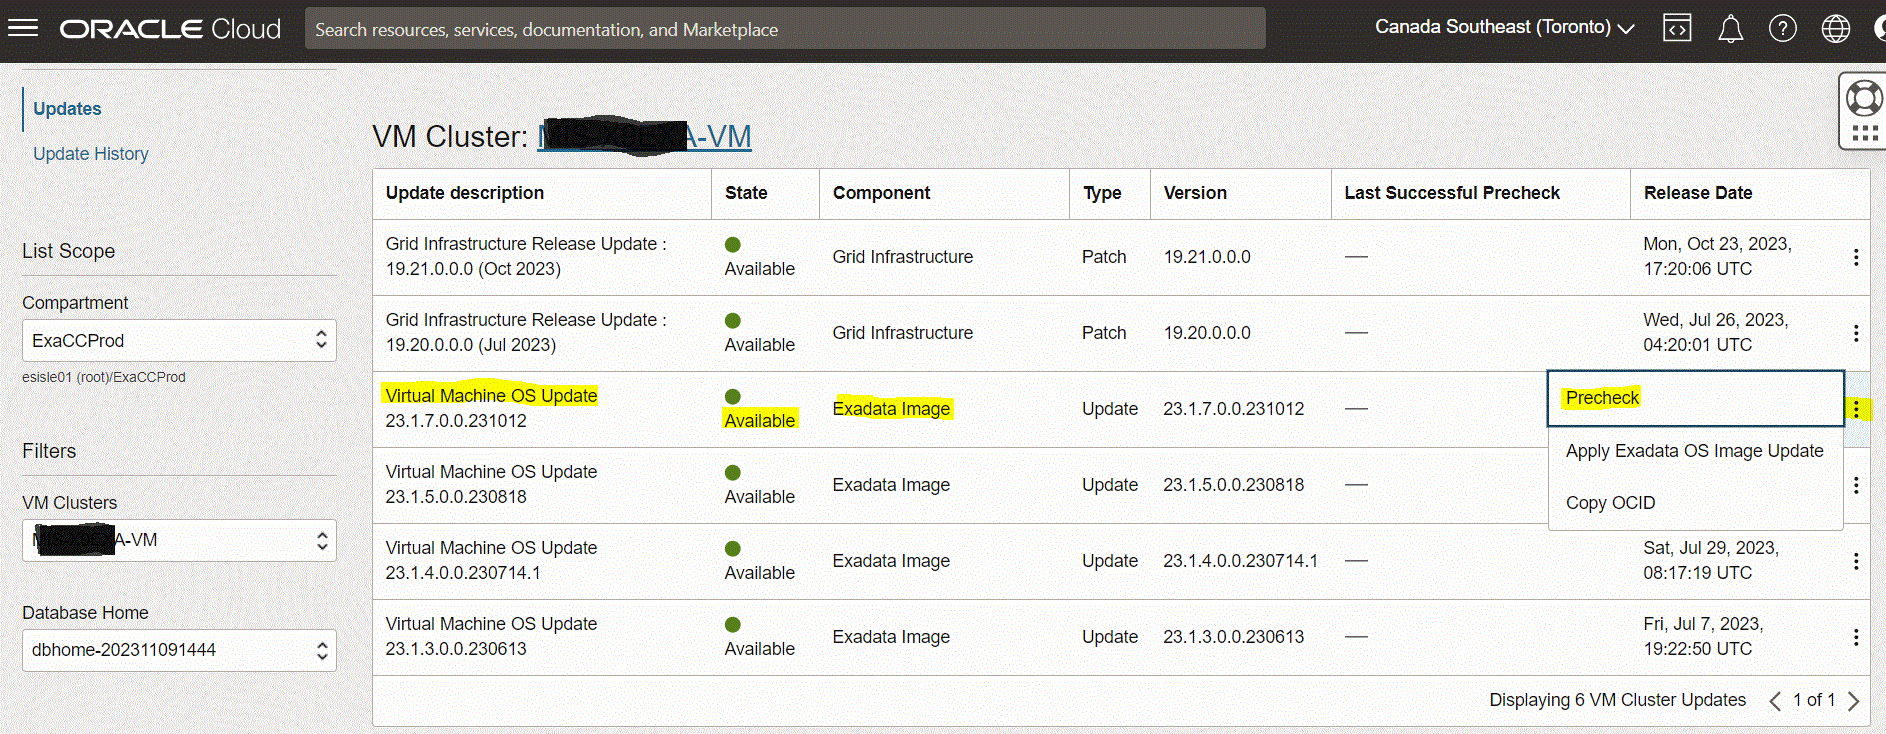

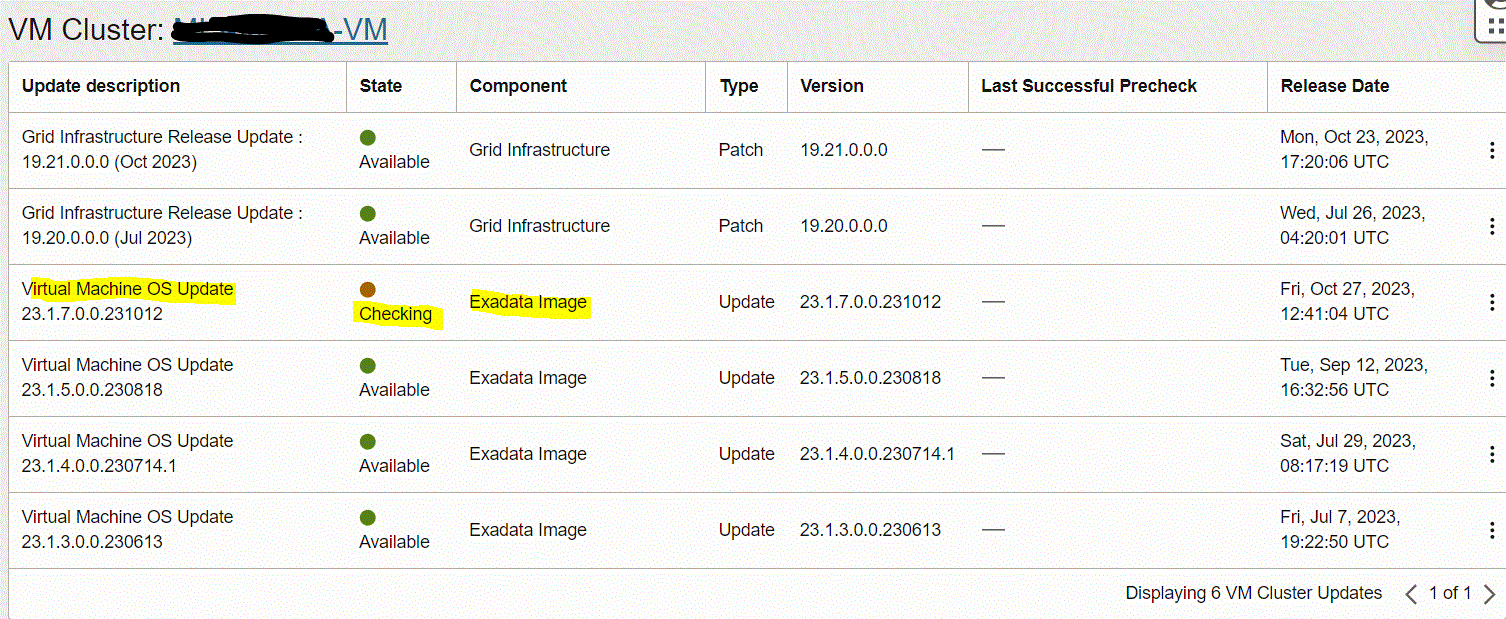
Note: once Precheck finishes, the update state will be “Available“. On the “Update History” page, the update state will be “Precheck Passed“.
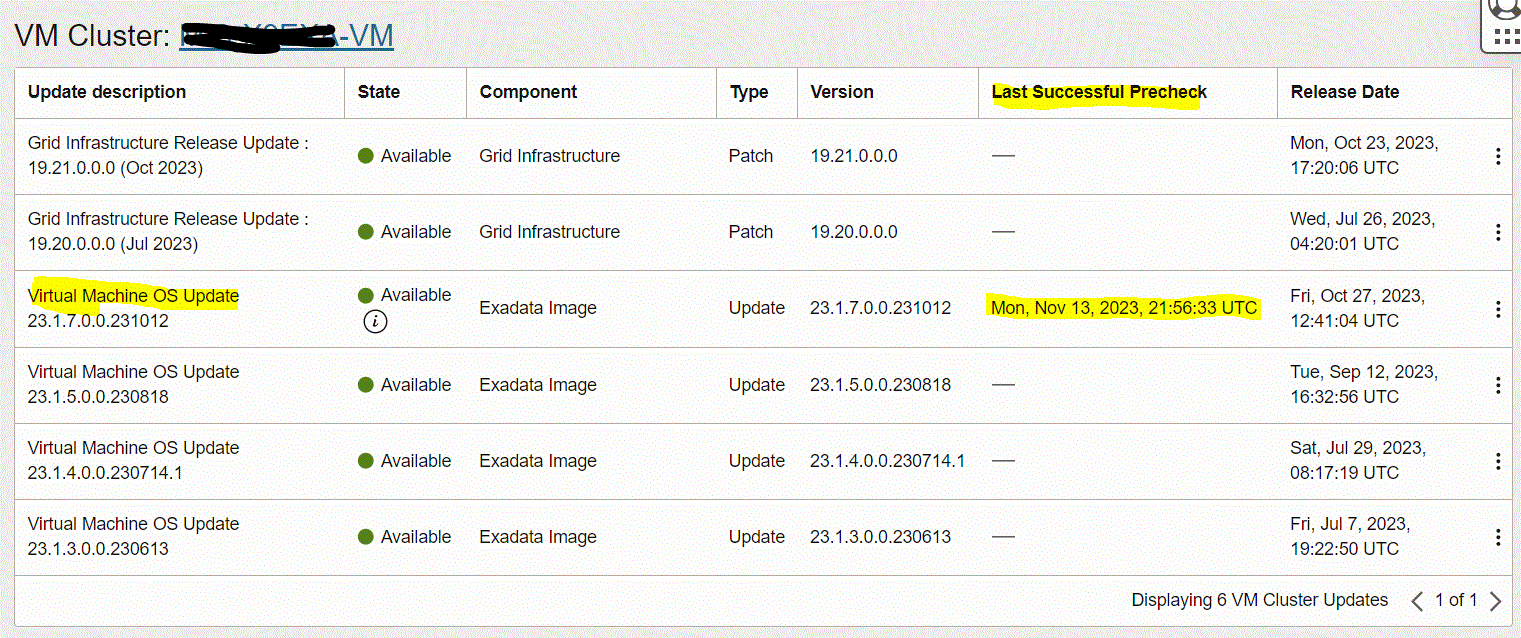

6. Apply Exadata OS Image Update.
Note: Patching of the VM Cluster’s Nodes will be executed in rolling mode to preserve database availability throughout the update process.
Click the Actions icon (three dots) at the end of the row listing the patch that passed Precheck, and then click the “Apply Exadata OS Image Update” action, then run the “Apply Exadata Image Update” button in the confirm screen.
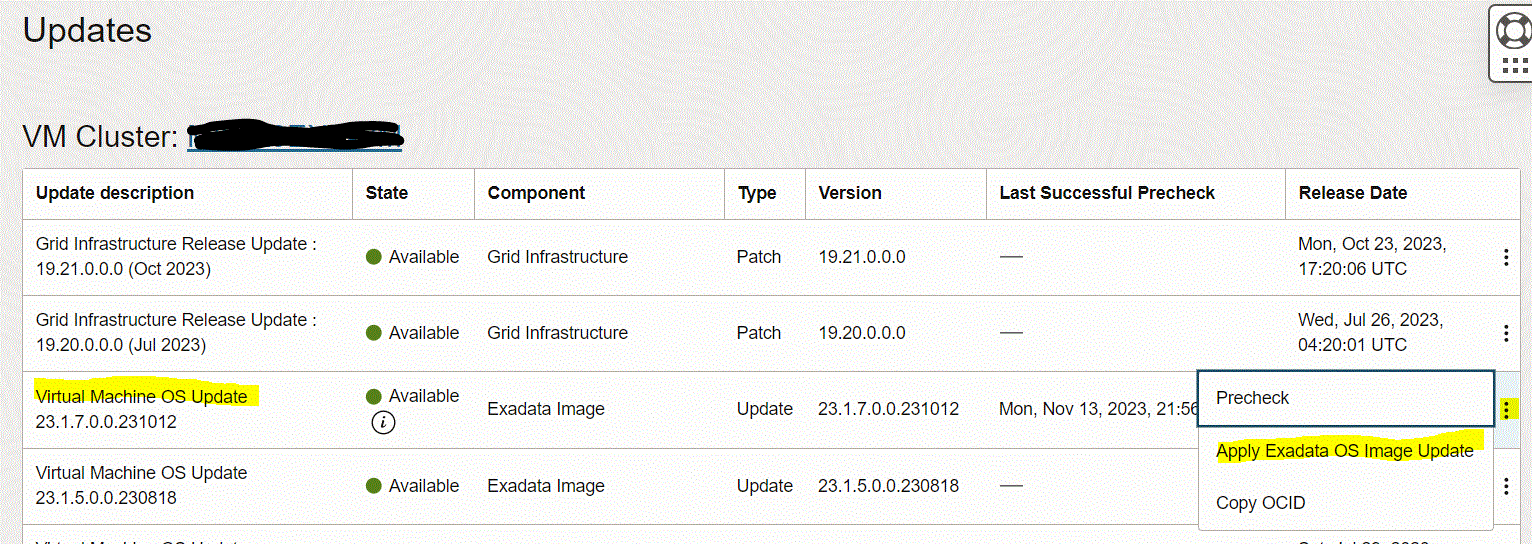
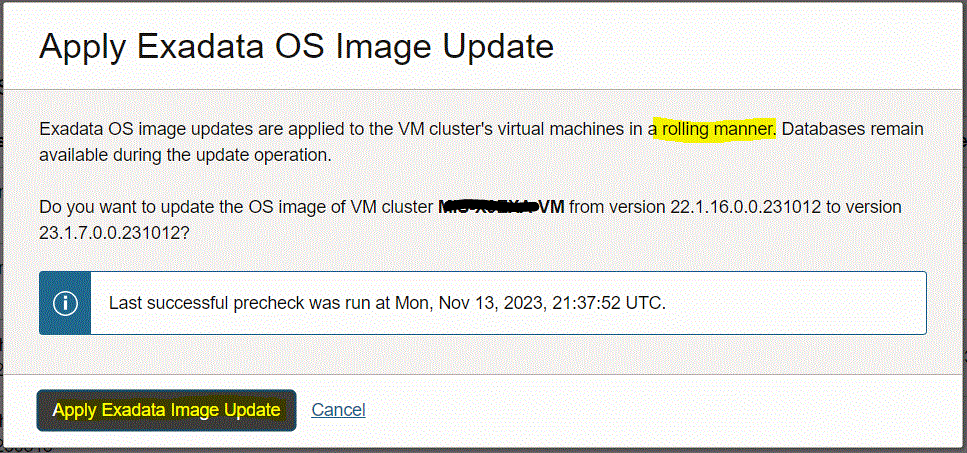


Note: Once patching finishes, on the “Update History” page, the update state will be “Applied“.

On the VM cluster details page, the Exadata Image Version will be updated.
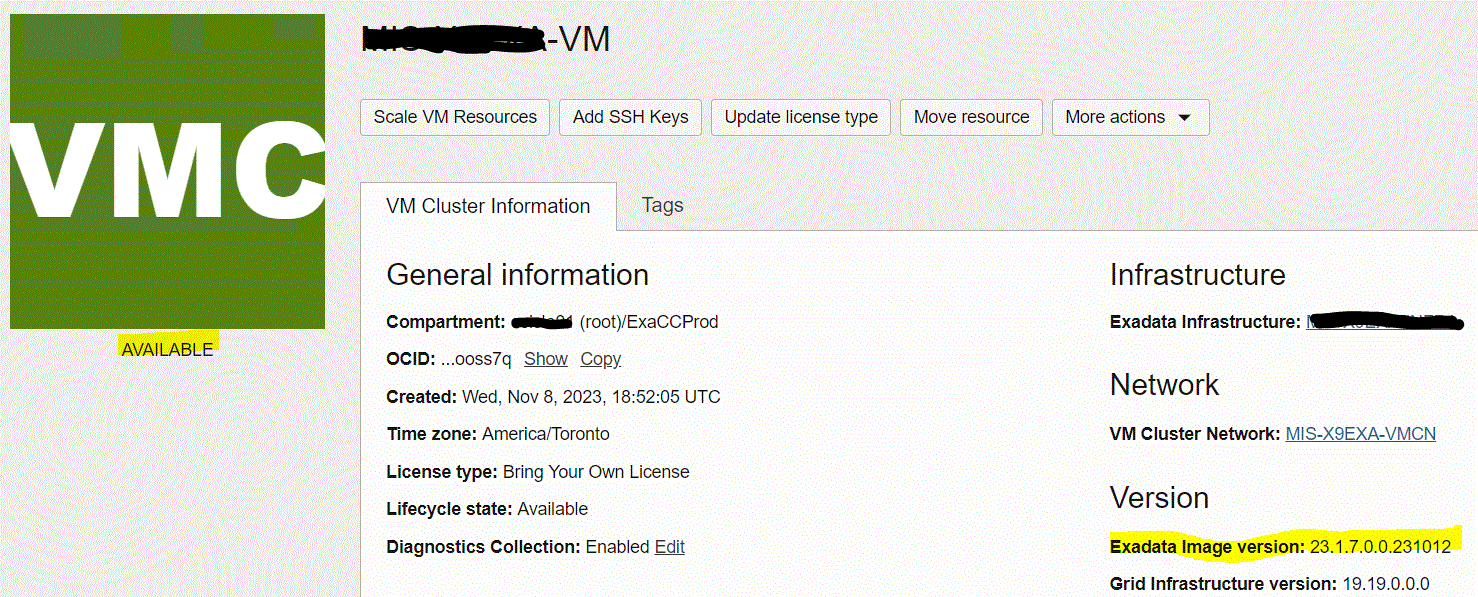
7. Confirm the Exadata image version by running “imageinfo” command on VM Cluster nodes.

Congratulations, patching VM cluster OS is completed!
Overview: Oracle 23c database introduces a new feature to open Pluggable database in a new mode called hybrid read-only Hybrid read-only mode enables ... Read More
Overview: A MySQL configuration is a collection of variables that define the operation of a MySQL DB system. It is analogous to ... Read More