OCI FortiGate HA Cluster – Reference Architecture: Code Review and Fixes
Introduction OCI Quick Start repositories on GitHub are collections of Terraform scripts and configurations provided by Oracle. These repositories ... Read More
Learn more about why Eclipsys has been named the 2023 Best Workplaces in Technology and Ontario, Certified as a Great Place to Work in Canada and named Canada’s Top SME Employer!
Learn more!
AWS CLI is a strong yet easy way to automate simple repeatable tasks covering AWS resources as it’s a direct, human-readable doorway to AWS Cloud Platform.
This tutorial will not just demonstrate how to provision a website in AWS Cloud, but will hopefully trigger your curiosity on the numerous possibilities the Command line tool can enrich your IaC experience with. We will see how it can amplify your productivity when combined with powerful shell scripts.
Here’s a direct link to my Github repo with all the scripts: https://github.com/brokedba/aws-cli-examples
Here’s also a gif demo if your curious: https://bit.ly/3hvTwVu
After a similar CLI experience done on Oracle (see my oci-cli post) I decided to take a shot at AWS CLI. The journey started with a simple instance launch script and ended up with an automated website provisioning on not one, but 6 different Operating systems 🙂 (RHEL, CENTOS, Ubuntu, amazon-linux2, SUSE, and Windows server). 5 interactive BASH scripts & userdata files were crafted. I also had to learn how auto-install and configure nginx in each mentioned OS’ (windows was the nastiest). On top of that, the code had to ensure that required network components were created if missing (route table, security group…).
It took me a few days to pull out but I am glad I did as I learned more about what’s under the API hood than before. Hoping this would also give a solid intro to AWS CLI for beginners.
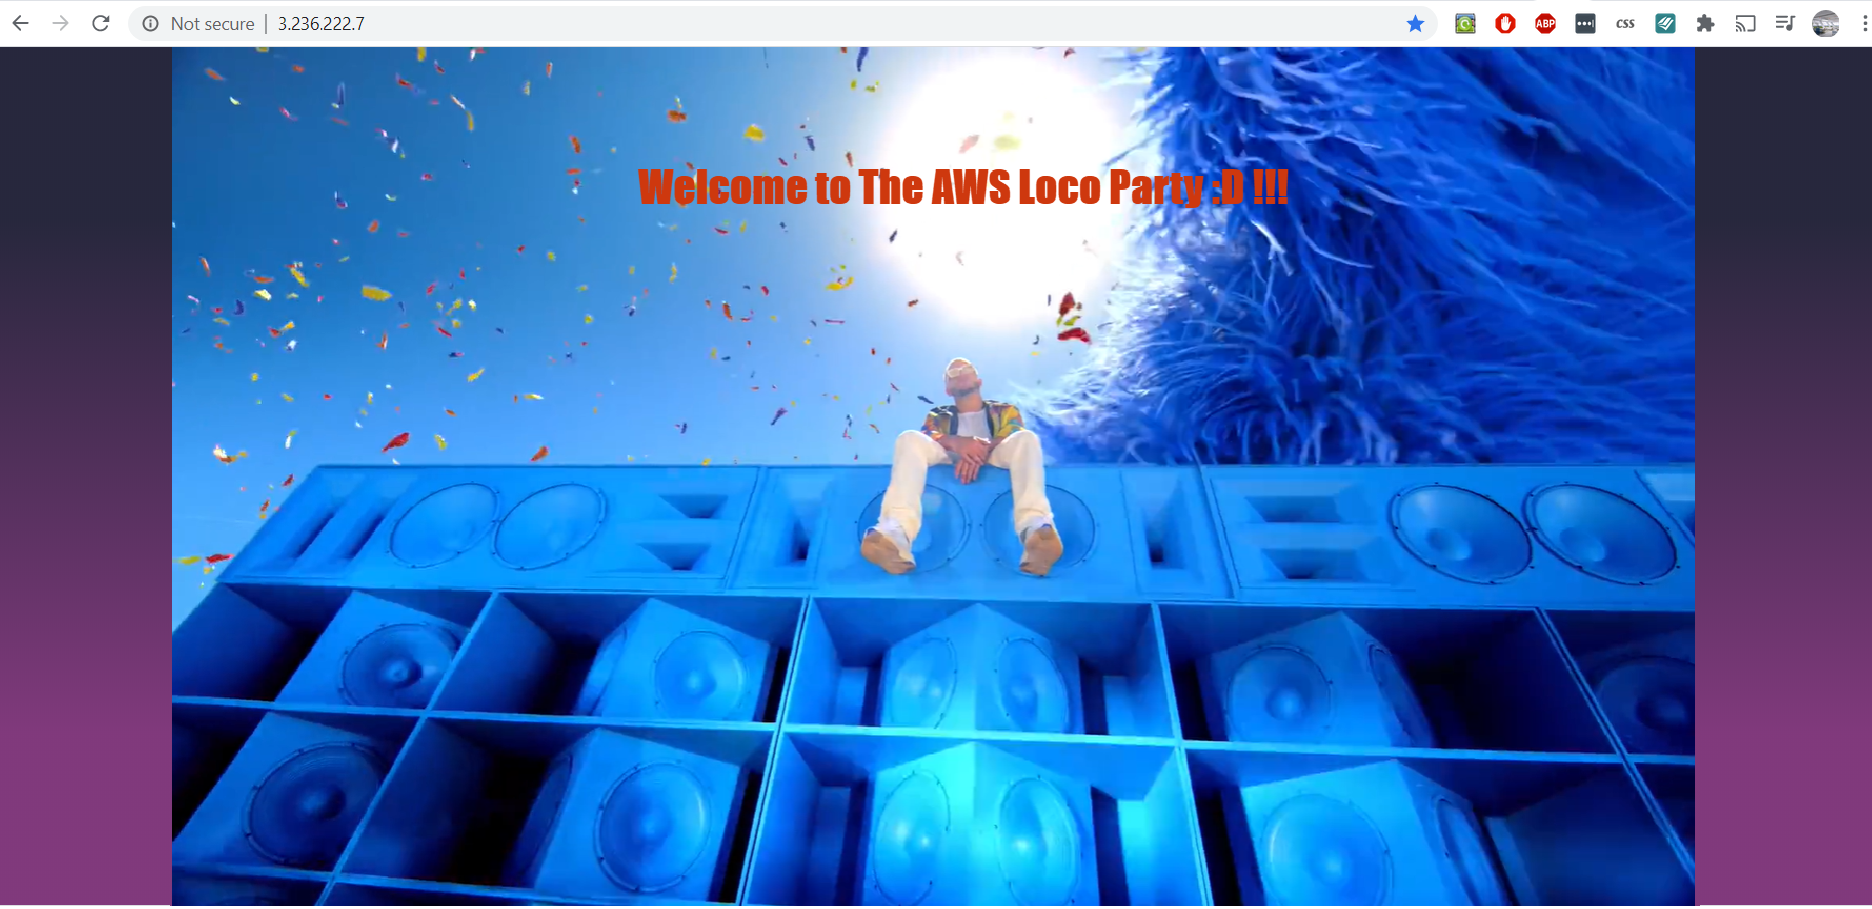
Bonus: If you like Latino music and Dj snake you’ll be in for a treat !! (complete the lab to know more ;))
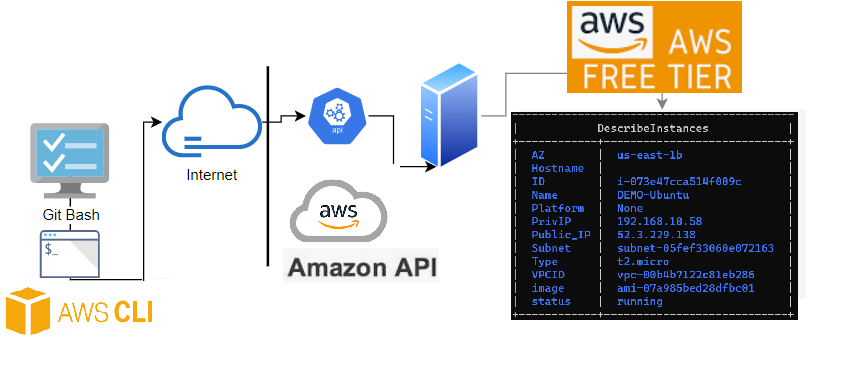
Topology
The following figure shows the layers involved between our workstation an AWS while running the CLI commands along with the instance attributes we will be provisioning (values might change).
CLI setup and assumptions
If your CLI environment is not configured yet, go check my previous post (aws-cli installation) before continuing.
I will assume that the below elements are present/configured in your workstation:
$ aws configure list
Name                    Value            Type    Location
----                    ---------        ----    --------
profile                 <not set>        None    None
access_key     ****************J2WA shared-credentials-file
region                us-east-1      config-file    ~/.aws/config
$ ssh-keygen -P "" -t rsa -b 2048 -m pem -f ~/id_rsa_aws
     Generating public/private rsa key pair.
 Your identification has been saved in    /home/brokedba/id_rsa_aws.
 Your public key has been saved in        /home/brokedba/id_rsa_aws.pub.
$ aws ec2 describe-regions --filters "Name=region-name,Values=us-west-2" --query 'Regions[]'
+-----------------------------+--------------------+-------------------+
|  Endpoint                   |    OptInStatus     |  RegionName       |
+-----------------------------+--------------------+-------------------+
| ec2.us-west-2.amazonaws.com | opt-in-not-required|   us-west-2       |
+-----------------------------+--------------------+-------------------+
$ git clone https://github.com/brokedba/aws-cli-examples.git
$ cd ./aws-cli-examples
$ tree
|-- check_image.sh       ---> Displays most recent AMI details per OS type
|-- create_igateway.sh   ---> Create an Internet Gateway to link to a route table
|-- create_instance.sh   ---> Launch an instance (requires a vpc and subnet)
|-- create_route.sh      ---> Create a route table & add a route to internet
|-- create_subnet.sh     ---> Create a subnet within the VPC
|-- create_vpc.sh        ---> Create a VPC with dedicated security group
|-- cloud-init           ---> Subfolder  containing bootstrap code for each OS
    |-- amzl_userdata.txt    ---> userdata script for amazon linux 2 instance
    |-- el_userdata.txt      ---> userdata script for CENTOS and RHEL7 instance
    |-- sles_userdata.txt    ---> userdata script for SUSE 15 instance
    |-- ubto_userdata.txt    ---> userdata script for Ubuntu instance
    |-- Win_userdata.txt     ---> userdata script for Windows server instance
1. CREATE A VPC
brokedba@ ./create_vpc.sh
  Enter the VPC name you wish to create [CLI-VPC]:
  selected VPC name : CLI-VCN
  Enter the VPC CIDR to assign '/16-To-/28' [192.168.0.0/16]: 192.168.0.0/16
  == VCN information ===
  VPC name = CLI-VPC
  CIDR = 192.168.0.0/16
  ==== Created VPC details ====
 +----------------+--------+----------------------+-------------+
 | CIDR           | Name   |      VPC_ID          | association |
 +----------------+--------+----------------------+-------------+
 | 192.168.0.0/20 | CLI-VPC| vpc-0091141e28608813c| associated  |
 +----------------+--------+----------------------+-------------+
Note : the last octet is always zeroed even if you specify a non zero value
************ Security Group ! ************
1) SSH port Only             3) SSH ,HTTP,RDP, and HTTPS
2) SSH, HTTP, and HTTPS
Select a security group ingress rule and press Enter: 2
*******************  Security Group detail  ******************
+---------------+----------------------------+-----------------------------+
|      Description      | Protocol  | SourceCIDR  | ToPort  | fromport   |
+-----------------------+-----------+-------------+---------+------------+
|  Inbound HTTP access  |  tcp      |  0.0.0.0/0  |  80     |  80        |
|  Inbound SSH access   |  tcp      |  0.0.0.0/0  |  22     |  22        |
+-----------------------+-----------+-------------+---------+------------+
SG delete command  ==> aws ec2 delete-security-group --group-id sg-a38937a4d75361
VPC delete command ==> aws ec2 delete-vpc --vpc-id vpc-0091141e28608813c
Tip: click on the script to see its CLI.
Delete command is also included in each script so you could destroy/repeat without using the Web Console.
2. CREATE A SUBNET WITHIN THE VPC
brokedba@ ./create_subnet.sh
 +----------------+--------+----------------------+-------------+
 | CIDR           |   Name | VPC_ID               | association |
 +----------------+--------+----------------------+-------------+
 | 192.168.0.0/16 | CLI-VPC| vpc-0091141e28608813c| associated  |
 +----------------+--------+----------------------+-------------+
 Select the VPC Name you wish to attach your subnet to []: CLI-VPC
 Selected VCN name : CLI-VPC
 Enter the subnet name you wish to create [CLI-SUB]: CLI-SUB
 Selected SUBNET name : CLI-SUB
 ============ SUBNET CIDR ==========================
 Subnet CIDR must be contained in its VPC CIDR block 192.168.0.0/16
 ===================================================
 Enter the VCN network CIDR to assign [192.168.10.0/24]: 192.168.10.0/24
 == Subnet information ===
  VPC name = CLI-VPC
  VPC CIDR = 192.168.0.0/16
  SUBNET name = CLI-SUB
  SUBNET CIDR = 192.168.10.0/24

==== Created SUBNET details ====
------------------------------------------
|             DescribeSubnets            |
+-----------+----------------------------+
|  AZ       |  us-east-1f                |
|  AutoIP   |  False                     |
|  CIDR     |  192.168.10.0/24           |
|  IP_COUNT |  251                       |
|  Name     |  CLI-SUB                   |
|  SUB_id   |  subnet-017a7233422dbec22  |
|  VPC_id   |  vpc-0091141e28608813c     |
+-----------+----------------------------+
--> Auto-assign Public IP enabled for CLI-SUB
Delete command ==> aws ec2 delete-subnet --subnet-id subnet-017a7233422dbec22
Note: The script still checks if the entered subnet CIDR has a prefix that is between the VPC’s CIDR prefix and /28.
3. CREATE AN INTERNET GATEWAY
brokedba@ ./create_igateway.sh
+----------------+--------+----------------------+-------------+
| CIDR           | Name   |      VPC_ID          | association |
+----------------+--------+----------------------+-------------+
| 192.168.0.0/16 | CLI-VPC| vpc-0091141e28608813c| associated  |
+----------------+--------+----------------------+-------------+

select the VPC you wish to add the I-Gateway to []: CLI-VPC
selected VPC name : CLI-VPC
Creating a New Internet gateway ...
Enter the Internet gateway name you wish to create [CLI-IGW]: CLI-IGW
==== Created Internet gateway Details ====
+------------------------+----------+------------+-------------------------+
|         Igw_id         |  Name    |   State    |         Vpc_id          |
+------------------------+----------+------------+-------------------------+
|  igw-0003fea32eb918944 |  CLI-IGW |  available |  vpc-0091141e28608813c  |
+------------------------+----------+------------+-------------------------+

Detach command ==> aws ec2 detach-internet-gateway --internet-gateway-id igw-00xx --vpc-id vpc-0091xxx
Delete command ==>  aws ec2 delete-internet-gateway --internet-gateway-id igw-00xx
4. SETUP A ROUTE TABLE
brokedba@ ./create_route.sh

Select the VPC you wish to set the route table for []: CLI-VPC
selected VPC name : CLI-VPC
Internet gateway exists => checking the subnet availability
...
------------------------------------------
|             DescribeSubnets            |
+-----------+----------------------------+
|  AZ       |  us-east-1f                |
|  CIDR     |  192.168.10.0/24           |
|  IP_COUNT |  251                       |
|  Name     |  CLI-SUB                   |
|  SUB_id   |  subnet-017a7233422dbec22  |
|  VPC_id   |  vpc-0091141e28608813c     |
+-----------+----------------------------+
select the subnet Name you wish to set the route table for []: CLI-SUB
Internet gateway and subnet exist => Setting up the new Route table
...
Create Route Table
Create new route to Internet Gateway for Route Table ID 'rtb-062ff0c3c7069c885'.
...
Associate 'CLI-SUB' Subnet with the Route Table.
...

==== Custom Route table entries for CLI-VPC ====
-----------------------------------------------------------------------------------
|                               DescribeRouteTables                               |
+--------+---------------+---------------------------+----------------------------+
| Main   | Name          | Vpc_id                    | rt_id                      |
+--------+---------------+---------------------------+----------------------------+
| False  | rt_CLI-SUB    | vpc-0091141e28608813c     | rtb-062ff0c3c7069c885      |
+--------+---------------+---------------------------+----------------------------+
||                                    Routes                                     ||
|+----------------------+-------------------------+--------------------+---------+|
|| DestinationCidrBlock | GatewayId               | Origin             | State   ||
|+----------------------+-------------------------+--------------------+---------+|
|| 192.168.0.0/16       | local                   | CreateRouteTable   | active  ||
|| 0.0.0.0/0            | igw-0003fea32eb918944   | CreateRoute        | active  ||
|+----------------------+-------------------------+--------------------+---------+|

Detach route command ==>  aws ec2 disassociate-route-table --association-id rtbassoc-
Delete route command ==>  aws ec2 delete-route --route-table-id rtb-69c885 --destination-cidr-block 0.0.0.0/0
delete route-table command ==> aws ec2 delete-route-table --route-table-id rtb-062
Delete commands are added at the end to get familiar with the delete syntax and know more about the underlying tasks.
5. LIST IMAGES
brokedba@ ./check_image.sh
******* AWS Image Selecta ! ************
Choose your Destiny ||{**}||
1) Oracle-Linux     3) Amazon Linux 2         5) Windows    7) Exit?
2) CentOS           4) Ubuntu                 6) Suse
Select an option and press Enter: 5
-------------------------------------------------------------------------------------
|                              DescribeImages                                       |
+--------------+--------------------+---------------------------------------+-------+
|          Ami |     Created        |       Name                            | SizeGb|
+--------------+--------------------+---------------------------------------+-------+
|  ami-06f6f331| 2020-09-09T06:26:58| Windows_Server-2016-English-Full-Base-|   30  |
+--------------+--------------------+---------------------------------------+-------+
6. CREATE INSTANCE
brokedba@ ./create_instance.sh

******* Oci instance launch ! ************
Choose your Shape ||{**}|| Note: t2.Micro is the default FreeTier elligible instance type used here
Enter the Path of your ssh key [~/id_rsa_aws.pub]:
Enter the name of your new Instance [Demo-Cli-Instance]: Demo-Win2016
-----
selected Instance name : Demo-Win2016
selected public key: /home/brokedba/id_rsa_aws.pub
The Instance Type will be the most recent FreeTier Elligible : t2.micro
------------------------------------------
|         DescribeInstanceTypes          |
+-----+------------+---------+-----------+
| Ghz | Instance   | Memory  | VirType   |
+-----+------------+---------+-----------+
| 2.5 | t2.micro   | 1024    | hvm       |
+-----+------------+---------+-----------+

********** Network ***********
-----------------------------------------------------------------------
|                            DescribeVpcs                             |
+-----------------+----------+-------------------------+--------------+
| CIDR            | Name     | VPCID                   | association  |
+-----------------+----------+-------------------------+--------------+
| 192.168.0.0/16  | CLI-VPC  | vpc-0091141e28608813c   | associated   |
+-----------------+----------+-------------------------+--------------+
select the VPC Name for your new instance []: CLI-VPC
selected VPC name : CLI-VPC

1. Internet gateway check
Internet gateway exists => checking the subnet availability
...
-------------------------------------------------------------------------------------
|                                  DescribeSubnets                                  |
+--------+---------+------------------+-----------+----------+-----------------------
| AZ     | AutoIP  | CIDR             | IP_COUNT  | Name     | SUB_id               |
+------------+---------+------------------+-----------+----------+-------------------
| us-east-1f | True    | 192.168.10.0/24  | 251       | CLI-SUB  | subnet-2dbec22   |
+------------+---------+------------------+-----------+----------+-------------------
Select The Subnet for your new instance []: CLI-SUB
selected subnet name : CLI-SUB
 Internet gateway and subnet exist => checking the Route table
...
  ...Route Table check

The vpc has a route table with a route across an internet gateway. checking the association with CLI-SUB subnet.
...

2. Route is associated with CLI-SUB subnet. Checking the Security Group
...
  ... Checking the availability of a security Group with SSH/HTTP ingress rule .

3. dedicated security Group ingress rules exists PORT (22,80).
... Creating the instance with the below SG .
----------------------------------------------------------------------------
|                          DescribeSecurityGroups                          |
+---------------+----------------------------+-----------------------------+
| Name          | SG_id                      | Vpc_id                      |
+---------------+----------------------------+-----------------------------+
| sg_CLI-VPC    | sg-0e8a38937a4d75361       | vpc-0091141e28608813c       |
+---------------+----------------------------+-----------------------------+
||                                  Rules                                 ||
|+-----------------------+-----------+-------------+---------+------------+|
|| Description           | Protocol  | SourceCIDR  | ToPort  | fromport   ||
|+-----------------------+-----------+-------------+---------+------------+|
|| Inbound HTTP access   | tcp       | 0.0.0.0/0   | 80      | 80         ||
|| Inbound SSH access    | tcp       | 0.0.0.0/0   | 22      | 22         ||
|+-----------------------+-----------+-------------+---------+------------+|

4. Choose your Image ||{**}||
1) RHEL   3) amazon Linux 2 5) Windows 7) Exit?
2) CentOS 4) Ubuntu         6) Suse
Select an option and press Enter: 5
-------------------------------------------------------------------------------------
|                  DescribeImages                                                   |
+-------------+------------------+---------------------------------------+----------+
|     Ami     |   Created        |          Name                         | SizeGb   |
+-------------+------------------+---------------------------------------+----------+
|  ami-06f6f3*| 2020-09-09T06:26 |Windows_Server-2016-English-Full-Base  |  30      |
+-------------+------------------+---------------------------------------+----------+
 >> opening port 3389

===== Instance Deployment Detail ========

  selected Subnet name : CLI-SUB
  selected Instance name : Demo-Win2016
  selected instance Type: t2.micro
  selected public key: /home/brokedba/id_rsa_aws.pub
  selected Security Group: sg-0e8a38937a4d75361
  selected OS : Windows
...
Importing/checking the key pair to/from AWS
key-pair exists ..

====================================
Check the status of the new Instance
====================================
The compute instance is being created. This will take few minutes ...
-------------------------------------------
|            DescribeInstances            |
+------------+----------------------------+
|  AZ        |  us-east-1f                |
|  Hostname  |                            |
|  ID        |  i-04b8144695dd402b0       |
|  Name      |  Demo-Win2016              |
|  Platform  |  windows                   |
|  PrivIP    |  192.168.10.156            |
|  Public_IP |  3.235.253.148             |
|  Subnet    |  subnet-017a7233422dbec22  |
|  Type      |  t2.micro                  |
|  VPCID     |  vpc-0091141e28608813c     |
|  image     |  ami-06f6f33114d2db0b1     |
|  status    |  running                   |
+------------+----------------------------+

Password is being generated... please wait
Windows User = Administrator
Password     => y=L6J&SrQ;kMnNB2z66Od(oYZtgyaZca
Generated password can be retreived using :
aws ec2 get-password-data --instance-id xxx --priv-launch-key ~/id_rsa_aws

Your website is ready at this IP :) : http://3.235.253.148

Termination command ==> aws ec2 terminate-instances --instance-ids i-04b8144695dd402b0

7. CONNECTION TO THE INSTANCE AND CHECK THE PUBLIC WEBPAGE
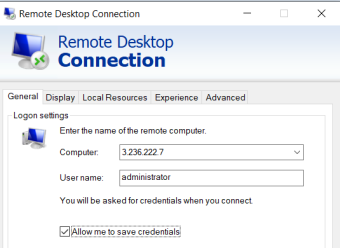
$ ssh –i ~/id_rsa_aws ec2-user@Public_ip
Now, what if I’m lazy (like most of us :p) and don’t want to re-create the routeing table, internet gateway or other security group rules for my instance?! Well, In that case, the create_instance script got you covered as it does just that for you. All you need to create is the VPC and Subnet, nothing else. From there, the instance script will check and create any missing network piece for you (internet gateway, Security group, opening HTTP ports,routes ..etc).
Thanks for reading!
Introduction OCI Quick Start repositories on GitHub are collections of Terraform scripts and configurations provided by Oracle. These repositories ... Read More

Introduction So far, I have used Oracle AutoUpgrade, many times in 3 different OS’. Yet the more you think you’ve seen it all and reached the ... Read More