OCI FortiGate HA Cluster – Reference Architecture: Code Review and Fixes
Introduction OCI Quick Start repositories on GitHub are collections of Terraform scripts and configurations provided by Oracle. These repositories ... Read More
Découvrez pourquoi Eclipsys a été nommée 2023 Best Workplaces in Technology, Great Place to Work® Canada et Canada's Top 100 SME !
En savoir plus !Those who aren’t lucky enough to use VMware or HyperV in their infrastructure might find it painful to provide a seamless way to manage their virtual backup and recovery strategy (i.e Ovm, kvm..etc.).
Veeam turns out to be a solid alternative that might spare the pain of reinventing the wheel along with the hours of scripting that come with it.
Today, we will demonstrate that with software like Veeam, we can restore a VM as if it was a physical machine using its Bare Metal recovery feature on a dummy virtual machine. Note that although the lab is based on VirtualBox, I have had a similar result when running it for OVM.
The following are the steps necessary to reproduce a simple DR test with VirtualBox VMs (scripting free).
1. Windows server2012 prerequisites for Veeam
Veeam 10 requires framework.net 4.7 and for that, you will need to make that windows server 2012 has the required pack (Instruction and download links are available here if you’re using an old version).
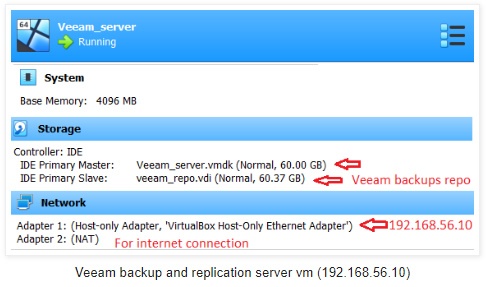
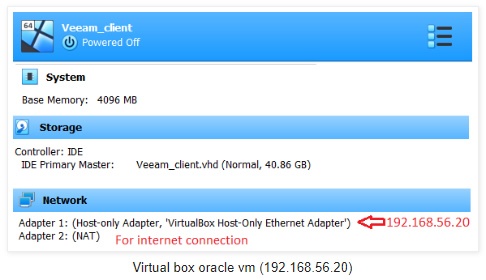
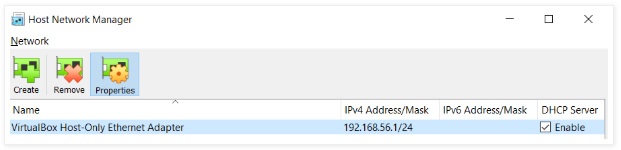
Note: Make sure you have defined the host-only adapter network in VirtualBox
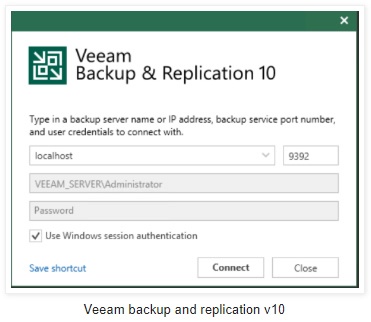
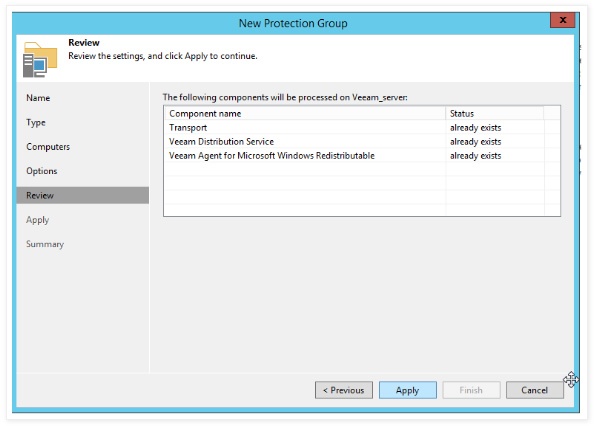
3. Veeam backup server installation
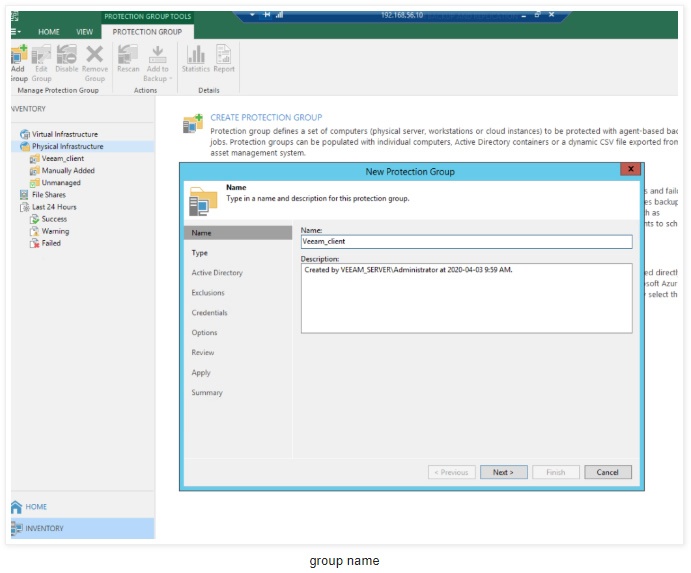
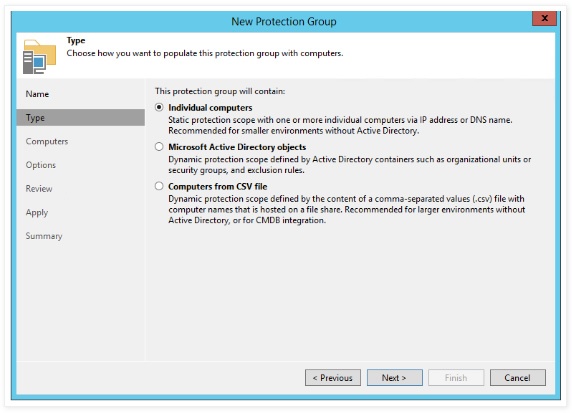
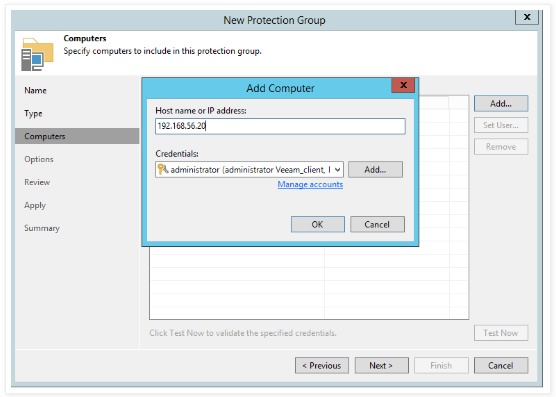
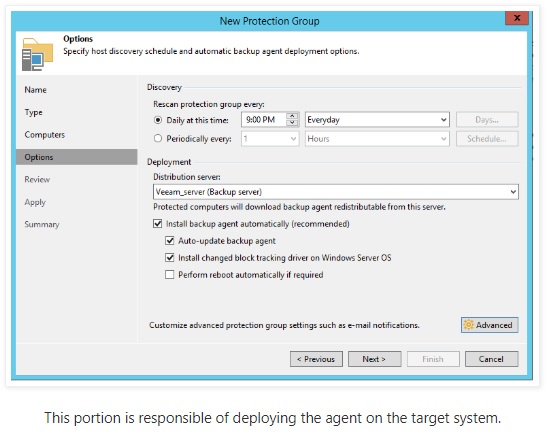
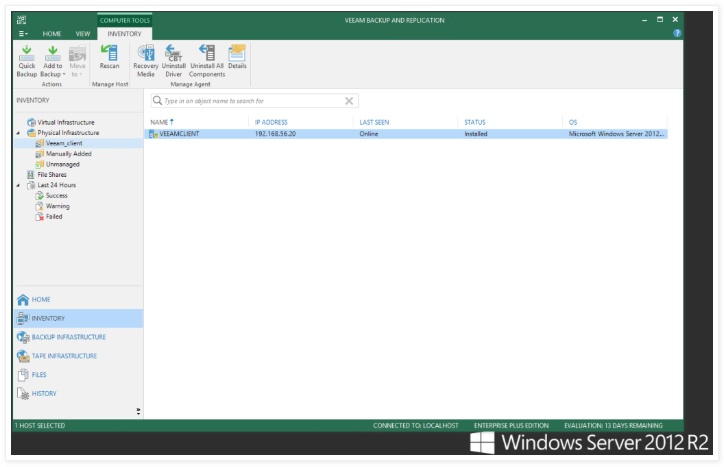
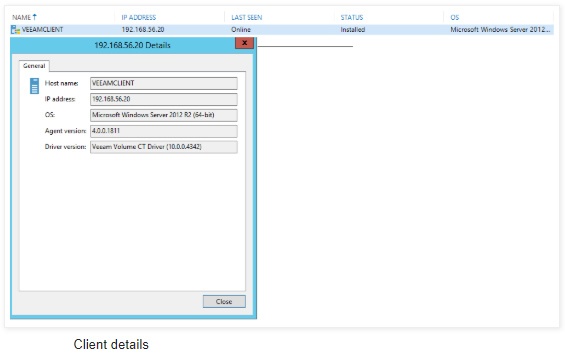
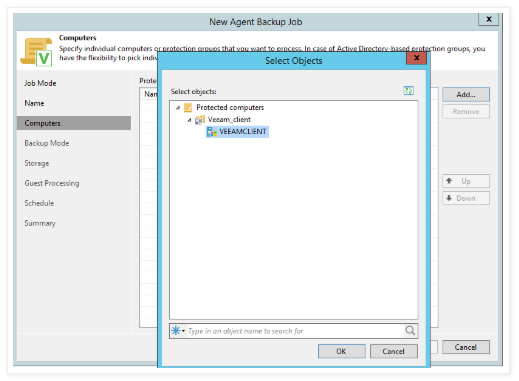
We will first have to create a protection group and add it to the infrastructure inventory which is just another name for Backup targets.

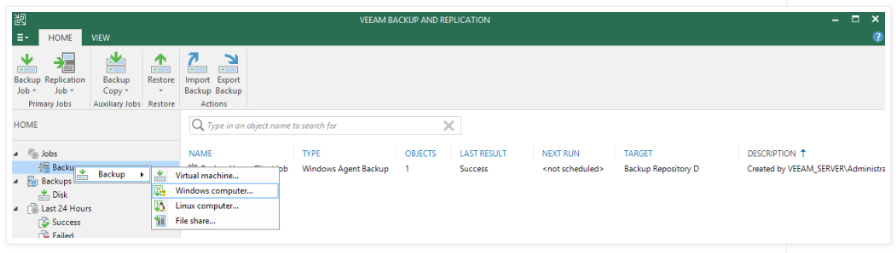
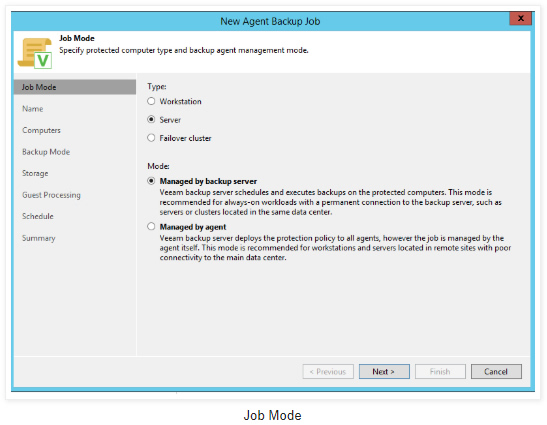
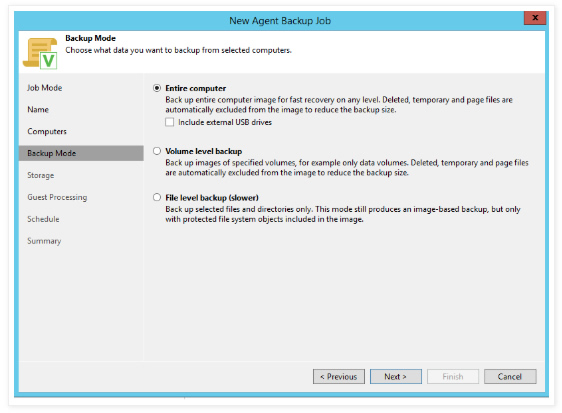
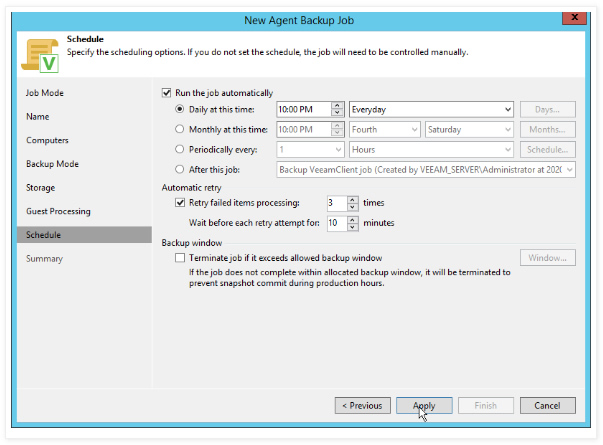
5. Agent Backup job creation (application-aware)
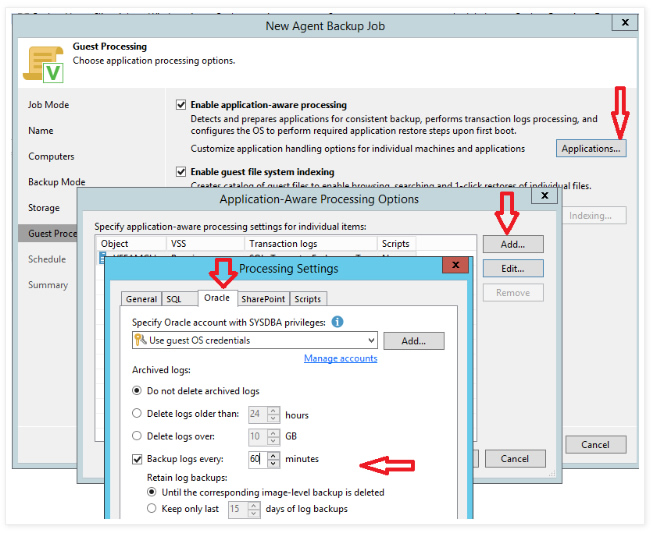
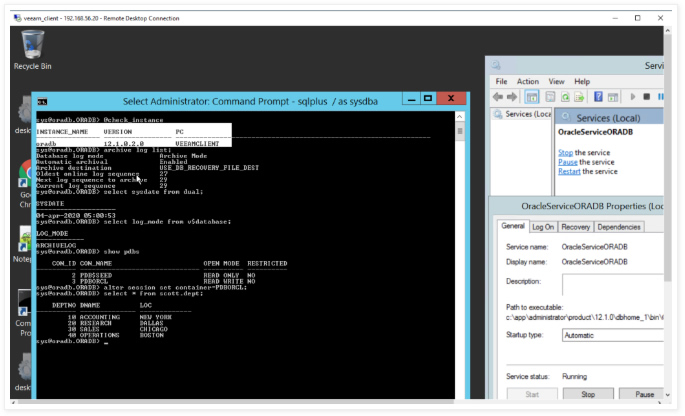
Note: I added the database SYSDBA credentials and specified the schedule and retention of archive logs backups.
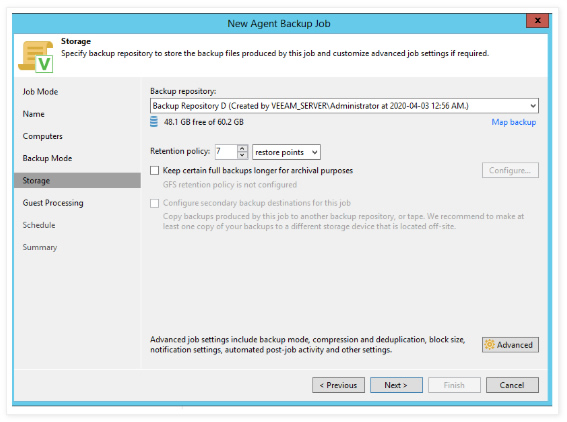
Confusion over Full vs Active Full: You will notice that there are two buttons available on the backup job interface.
START (synthetic) and ACTIVE FULL (active).
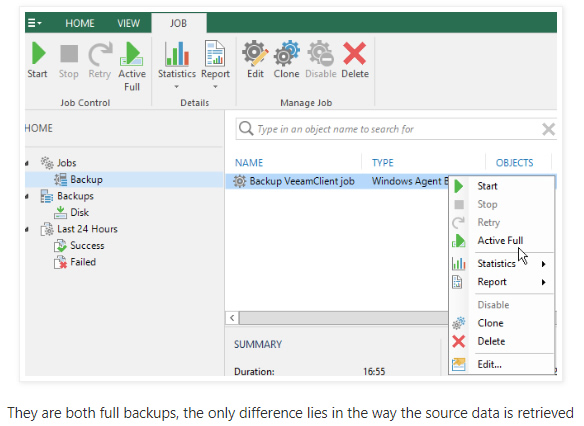
hence our first backup will be de-facto run as an active full backup. The below screenshot displays the report of my first backup which was pretty fast for a 24GB target VM.
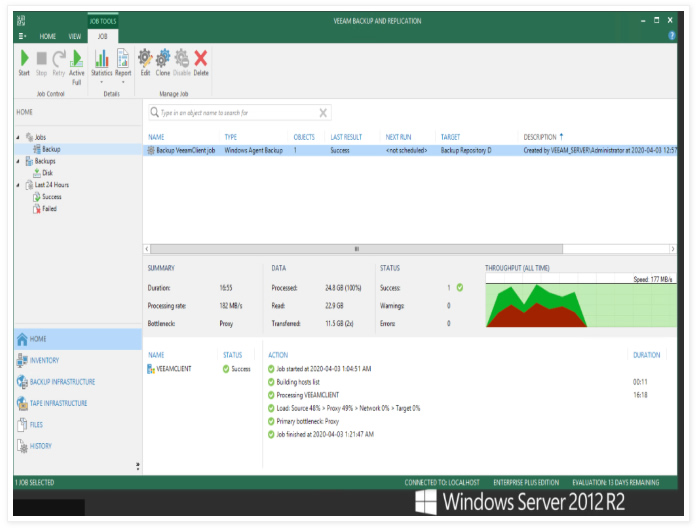
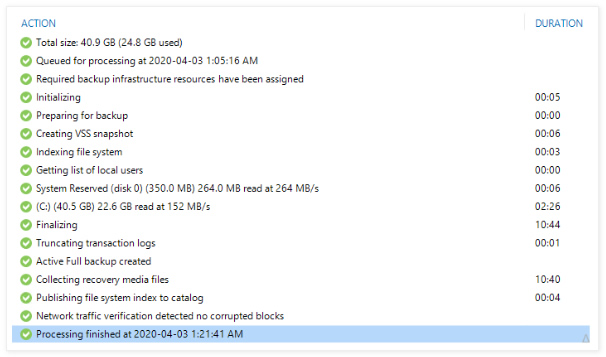
Note: The source disks are virtual disks(vmdk) but the compression here still reached an x2 fold ratio.

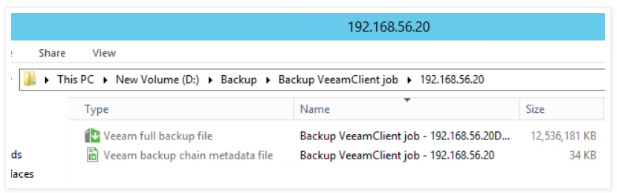
The Resulting backup output is two files including both data and metadata of the backup
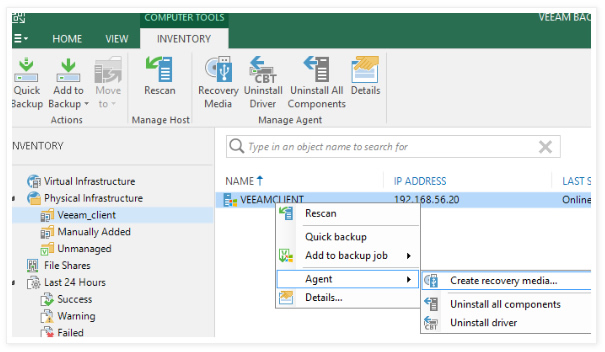
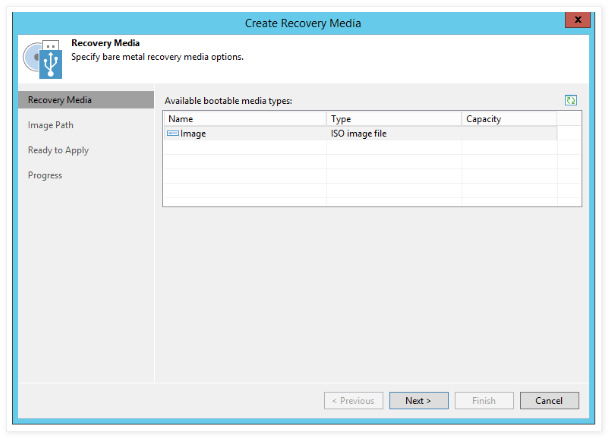
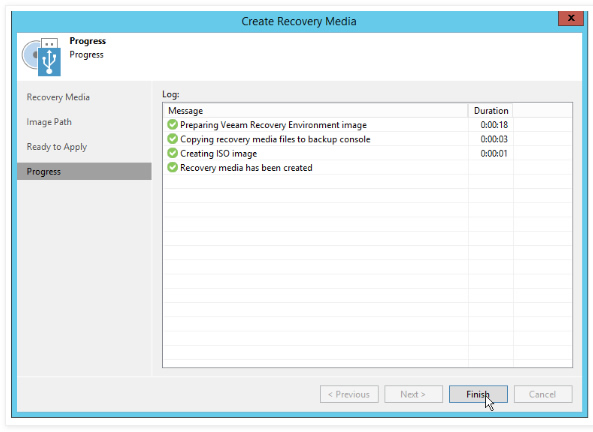
7. Create a Recovery media using agent backup
At this point, we have all we need to create a bootable recovery media which will allow us to restore the crashed VM

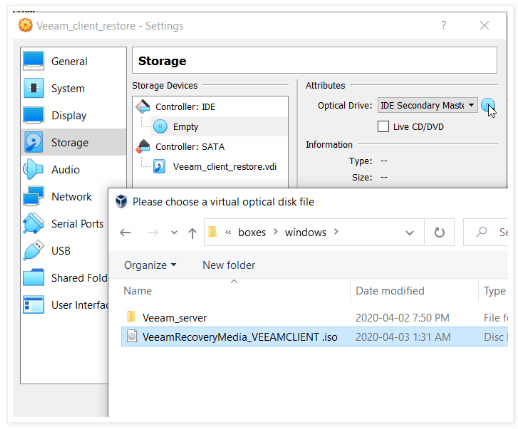
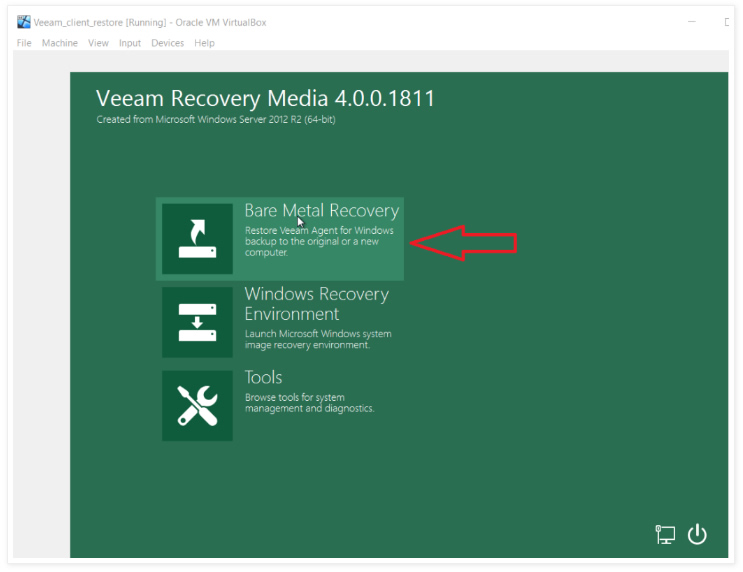
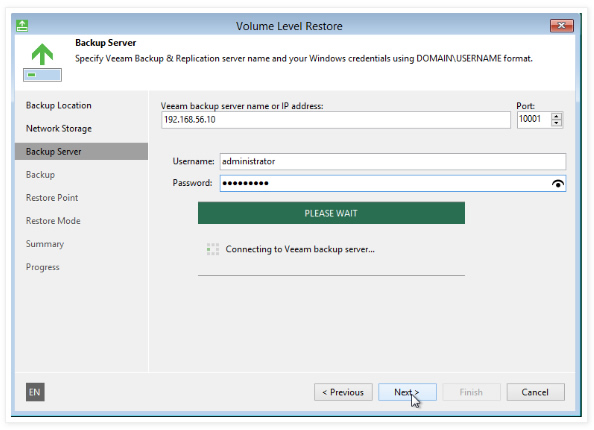
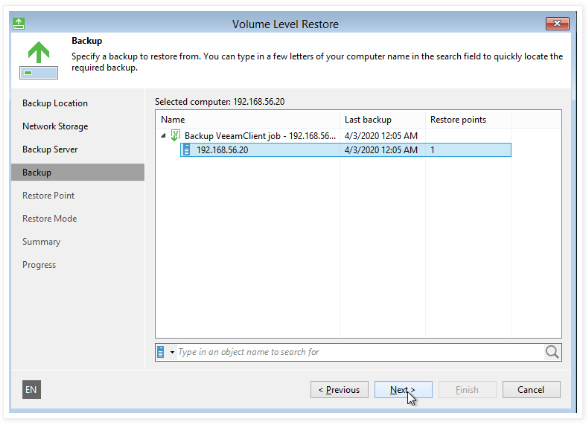
8. Proceed with a Bare Metal recovery
That’s where the fun begins. Now that the ISO file is ready we can finally get to the real deal and prepare our DR test.
To make it even safer we will not need to literally destroy the original VM but only switch it off to avoid IP overlap when booting the new machine.
The trick here is to fool Veeam backup tool by spinning a shell VM with similar hardware specs (disks/network adapters) than the original machine before mounting the recovery ISO in the DVD drive.
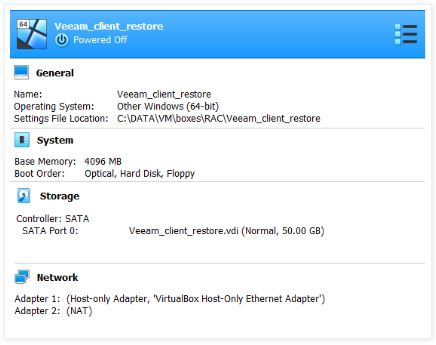
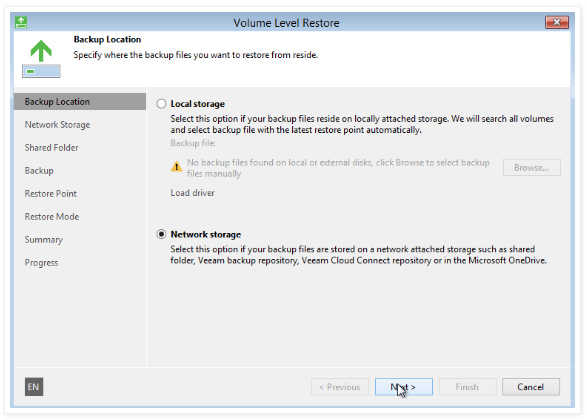
Attention: Make sure the new VM’s disks are as large as the original ones otherwise your restore will trigger an error (Unable to auto-match disks)
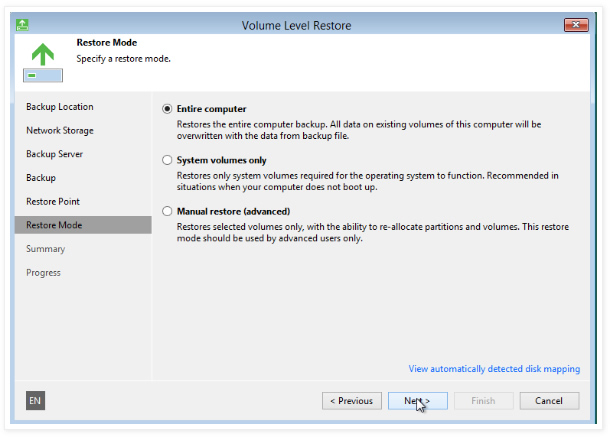
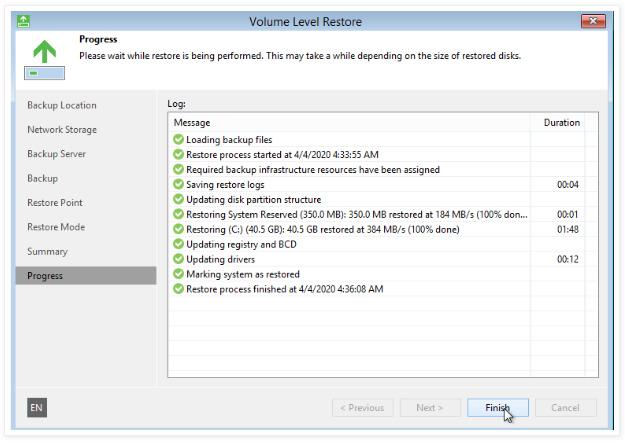
Sweet! now let’s check whats under the hood.
Tip: Do not accept to reboot. Just shut down the VM and un-mount the ISO before restarting the VM.
Smooth and easy. We have just demonstrated how virtual machines can be recovered through a Veeam Backup feature that is initially built to restore Bare Metal servers. Quite a simple and effective solution for shops that use non-flexible hyper-visors like OVM where recovery implementations can be tedious. Think of all the production refreshes done in a timely fashion when urgent needs emerge. On top of that, the synthetic backups will also reduce the overhead on your production system.
Furthermore, the backup used in this lab incurred no downtime (hot backup) and the Application-Aware Processing feature coupled with Microsoft VSS technology guarantee a transactionally consistent backup for windows machines(Oracle/SQL server/SharePoint).
Veeam for Linux VMs:
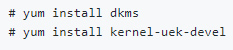
I have tried to deploy the Veeam agent for Linux the same way than for windows. However, you will need to install both dkms and kernel-devel packages before deploying the agent (you might need help from Veeam support if issues arise).
Introduction OCI Quick Start repositories on GitHub are collections of Terraform scripts and configurations provided by Oracle. These repositories ... Read More

Introduction So far, I have used Oracle AutoUpgrade, many times in 3 different OS’. Yet the more you think you’ve seen it all and reached the ... Read More