OLVM: Upgrade from 4.4 to 4.5
Introduction VMware vSphere has long held the crown as the leading on-premises server virtualization solution across businesses of all sizes. Its ... Read More
Découvrez pourquoi Eclipsys a été nommée 2023 Best Workplaces in Technology, Great Place to Work® Canada et Canada's Top 100 SME !
En savoir plus !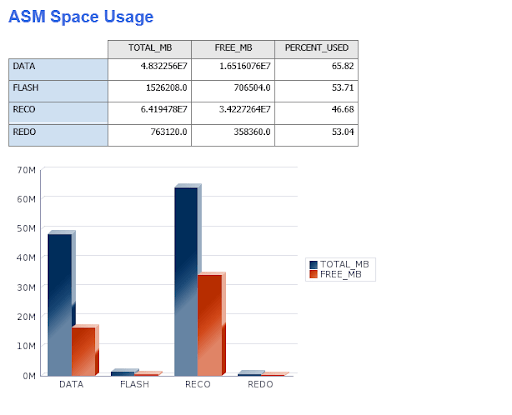
The OEM (Original Equipment Manufacturer) 13c cloud control has enabled reporting features to represent data in a graphical manner. We can use the OEM Repo Database to extract the required information to perform proactive DBA administration. Representing data using graphs, pie charts etc… help dba’s to get the complete picture of the environment in a short period of time. These health check reports help to address issues in a proactive manner.
Managing 100+ databases needs this kind of BI (Business Intellience) reporting. As DBAs (Database Appliances), we need to make sure to address issues proactively.
This article will cover BI report creation. To create these reports OEM BI component should be up and running.
Use the below mention command to verify the component status.
[oracle@em13clnx bin]$ ./emctl status oms
Oracle Enterprise Manager Cloud Control 13c Release 3
Copyright (c) 1996, 2018 Oracle Corporation.  All rights reserved.
WebTier is Up
Oracle Management Server is Up
JVMD Engine is Up
BI Publisher Server is Up
As the component is up and running, we can log in to the BI reporting console.
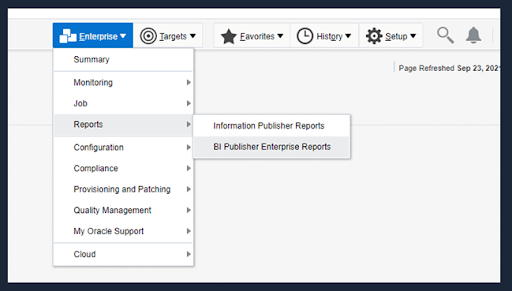
Creating reports consists of four steps.
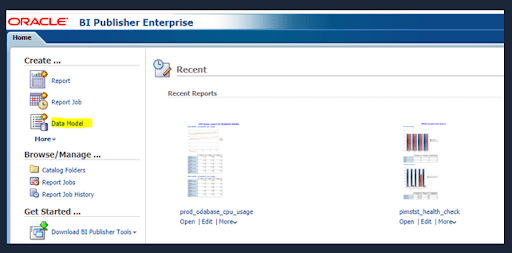
The initial step is to create a data model, Login to the BI console and select the data model.
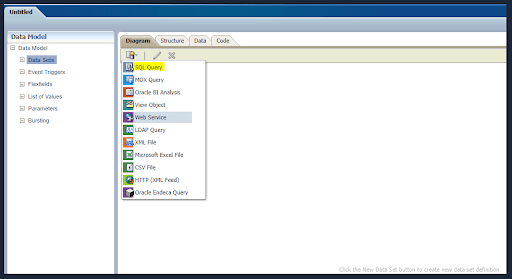
The best option is to start with an SQL query because we can extract required data from OEM repo database views and tables.
This figure illustrates selecting the SQL query as a Data Model Set.
Use this as a sample query to get ASM (Automatic Storage Management) space usage and create a sample data model.
Make sure to change the target information as per your environment.
select TARGET_NAME,TABLESPACE_NAME,TABLESPACE_SIZE,TABLESPACE_USED_SIZE,COLLECTION_TIMESTAMP
from MGMT$DB_TABLESPACES
where TARGET_NAME ='pimstst'
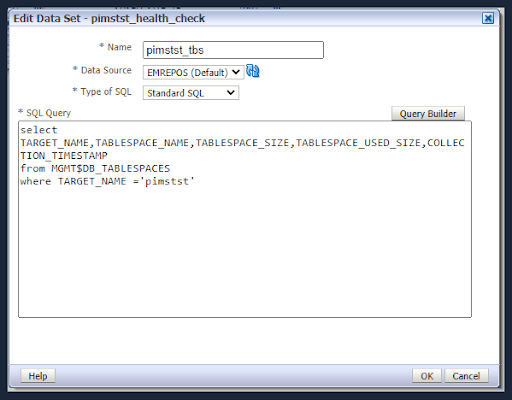
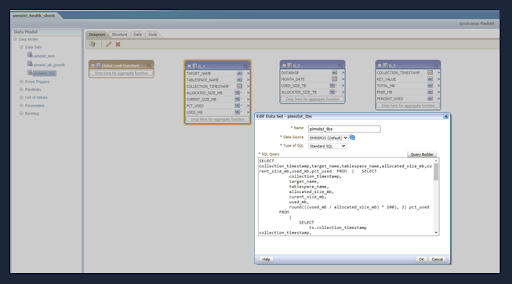
Even you can create a few more data models to get DB growth and tablespace usage etc…
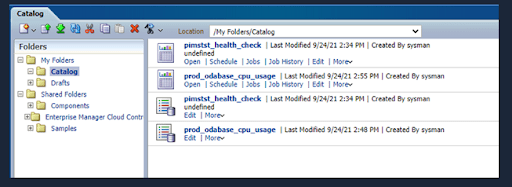
For newly created reports and data models, the best practice is to create a separate folder and save the reports and data models.
Once the data model creation is complete select the report icon and associate the correct data model.
Also make sure to save the sample data, because we are going to use this sample data to create the report.
This figure illustrates saving the sample data.
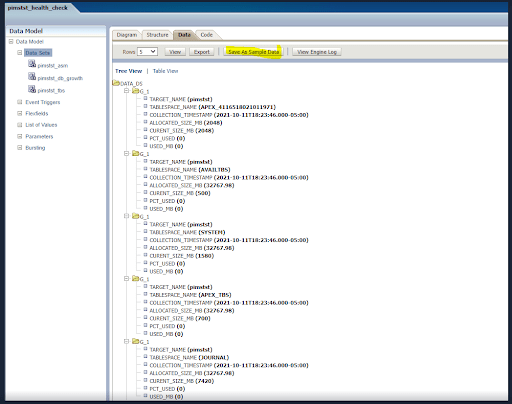
Same window top right there is the icon to create the report. select the create report icon will move to the report creation console.

This figure shows to report creation, There are two options
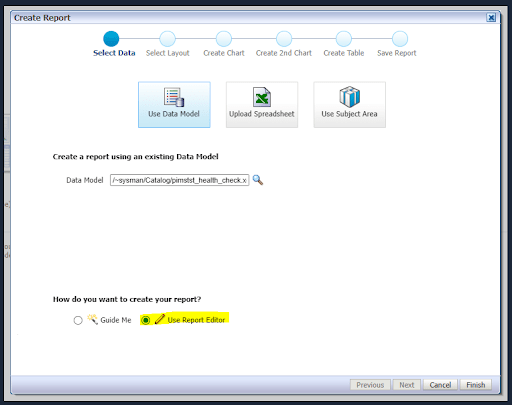
First, create a layout. In this figure, we created 1 column with 10 rows.
The next step is to select the appropriate table, as we need to generate a graph using a pivot table.
Field can be dragged and dropped to the pivot table.
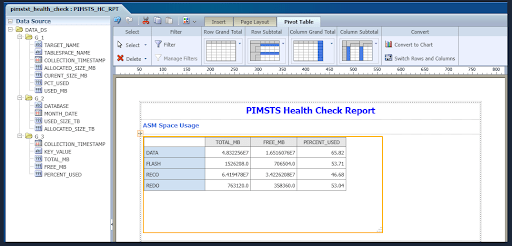
Copy the created pivot tables and copy them to the next row. One table we use to give data information. Another one we can convert to chat.
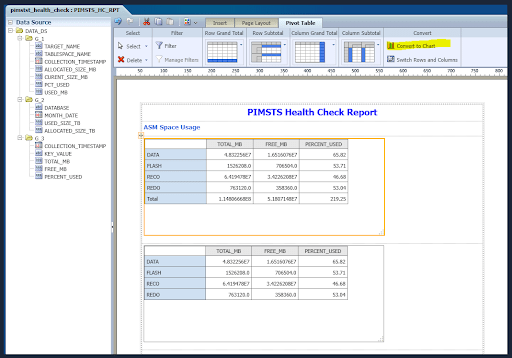
Pivot tab there is an option to the covert table to graph, This figure shows converting a table to the graph.
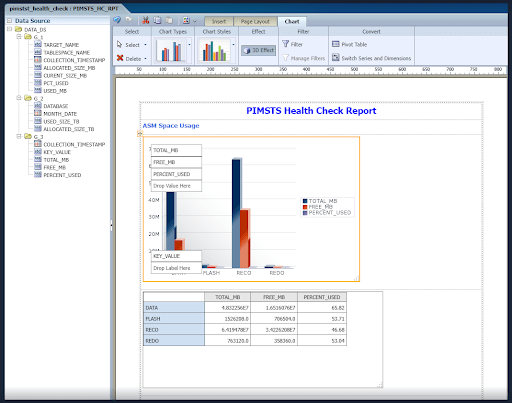
Save the report and go back up to main windows and view the report
Congratulation! You are the first to report is complete.
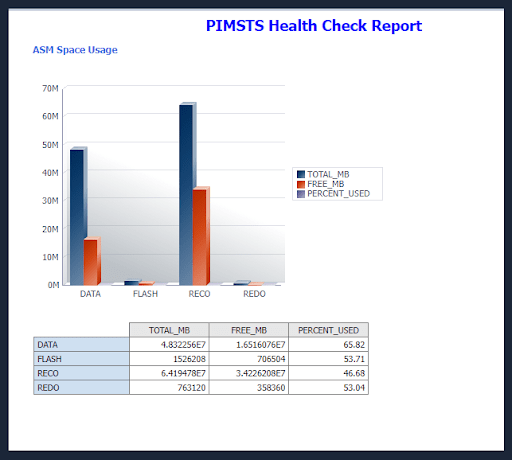
Setup Email
It’s not that hard to set up email delivery, Navigate to the administration tab and select the email and provide the required email username, password and port number.


Schedule Report
The next step is to schedule a report, to schedule a report click the more icons on the created report. This will open another window feed information such as email address and mail subject etc…
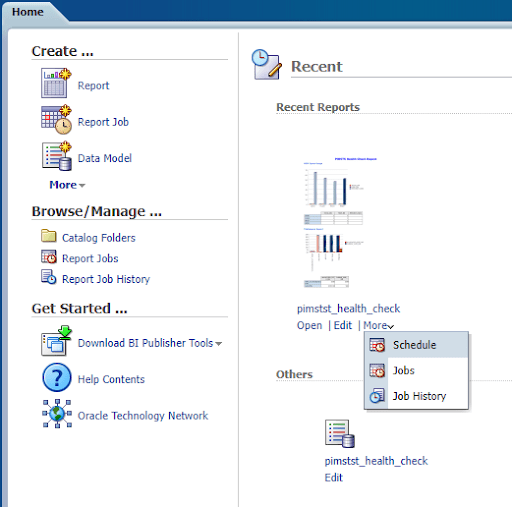
This figure illustrates the scheduling report using an email address.
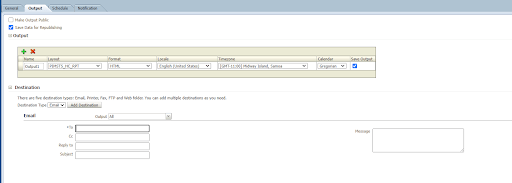
Schedule the frequency of the report generation as per your requirement. This can be once a month, weekly or daily.

Job-status can be verified after the report generation.
![]()
Introduction VMware vSphere has long held the crown as the leading on-premises server virtualization solution across businesses of all sizes. Its ... Read More
Introduction Monitoring plays a major part in mission-critical environments. Most businesses depend on IT infrastructure. As the ... Read More