Considerations for ODA X7-2 HA Rack & Stack as well as Bare Metal Deployment
Installation of the ODA X7 has some new considerations. Oracle has made some key modifications and being prepared for the installation will save you time and effort. Following the steps listed in this blog post will help ensure a smooth installation.
After racking the ODA, You will need to connect to the serial management (SER MGT) port on both the ODA node 1 and node 2 to configure the ILOM IPs.

You will need a USB to RJ45 Console Cable or Serial Rollover Cable as shown below.
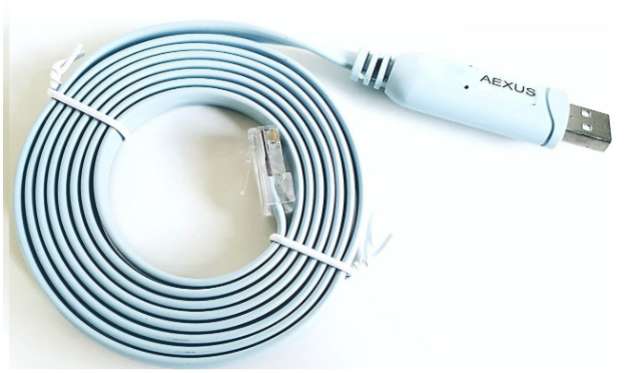
https://www.amazon.ca/gp/product/B076Z8RN5Q/ref=oh_aui_detailpage_o01_s00?ie=UTF8&psc=1
After connecting the cable between your laptop and the ODA Node 1 SER MGT port
Windows
- Go to Device Manager
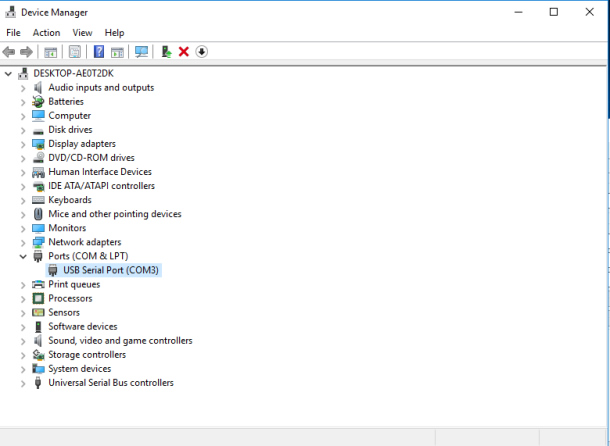
- Under “Ports (COM & LPT)”, you should notice your serial cable recognised. In our case it shows up as “USB Serial Port (COM3)”
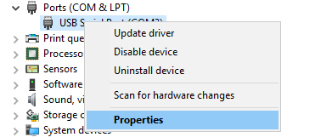
- Right-click on your device and then click on “Properties”
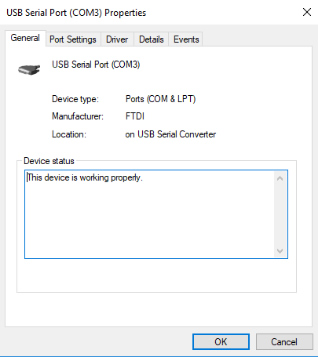
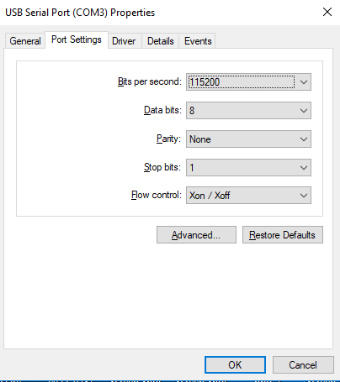
- Click on the “Port Settings” tab and select “115200” from the options under “Bits per second”.
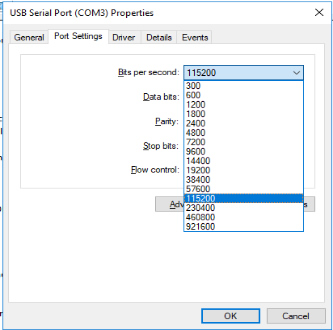
- Also ensure that “Flow control” is on “Xon / Xoff”. Do not forget to click “OK” when done.
In Putty-
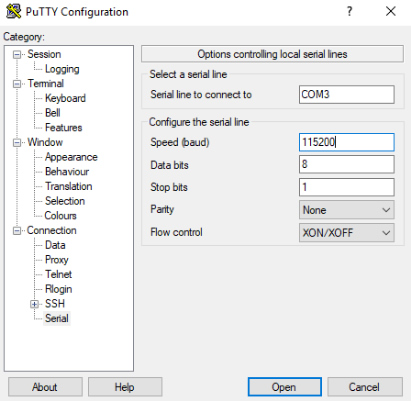
- Ensure that the “Serial line to connect to” field is populated with the corresponding COM # under “Ports (COM & LPT)” in “Device Manager” as shown previously. In our case, the “COM #” is “COM3”.
- The “Speed (baud)” should correspond to the value set in “Device Manager” =”115200”.
- Also ensure that “Flow control” is on “XON/XOFF”. Do not forget to click “Open” when done to connect to your ILOM interface.
Mac
CABLING:
The process of racking the ODA X7-2 HA and performing the cabling is pretty much similar to any other ODAs that you might’ve racked in the past; so you can easily get the hang of it once you’re into it.
One key factor that you should however consider is with regards to how the cabling between the storage shelf and ODA nodes is done.
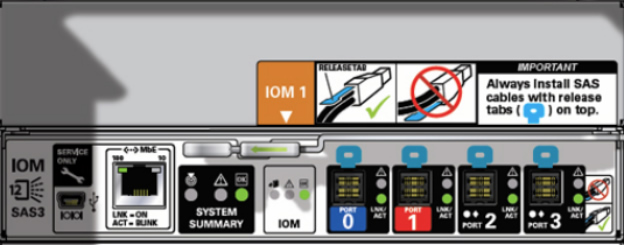
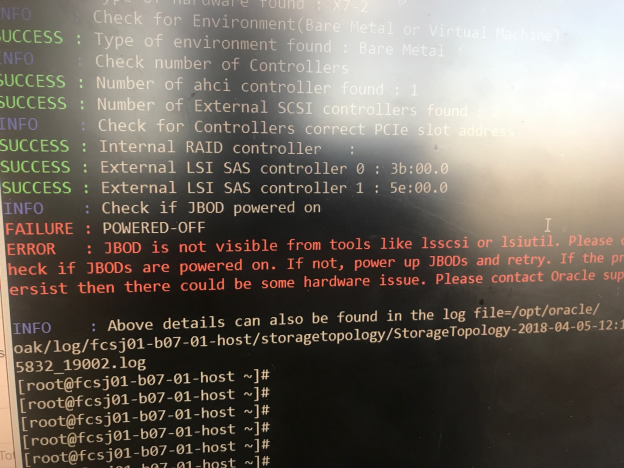
The image above is taken from the rear of the ODA X7-2 HA storage shelf; Top IO Module to be exact. Behind the storage unit, you will find a sticker indicating how the SAS cables are to be attached to the storage. Always ensure that the BLUE RELEASE TABS attached to the ends of the SAS cables appear ON TOP when fixing them to the storage shelf. Regardless of whether or not you feel it’s firm in the slot, you still need to ensure the above, else you might encounter the error below upon running the “oakcli validate -c storagetopology” on ODA node 1.
REIMAGE PROCESS
If during the ODA reimage, you realise that the ODA is not booting from your chosen ISO file, do well to untick “enable ssl” during connecting ISO under kV’s storage selection.
When reimagine is complete and the text on the screen signals a system reboot, disconnect ISO image from ILOM to prevent system from booting from the ISO again to redo the reimage process; and wait for reboot to complete.
More from this Author
Encountering errors can often lead us down a rabbit hole of troubleshooting and investigative work. Recently, a scenario encountered highlighted the ... Read More
Introduction: Creating a clone of a remote pluggable database across a database link can be a powerful tool for managing and replicating data across ... Read More